Macro Keyboard 'Stream Deck'
A DIY Stream Deck; it's a desk macro controller for stream broadcasters, presenters and video callers alike - this is a (way) cheaper and more fun version!

I have been doing a lot of Teams & Jitsi calls lately, like a lot of people around the world due to the COVID-19 pandemic. Modern communications have thankfully made staying in touch with friends, family & colleagues much easier during the lock-down.
The big increase in video conferencing and delivering online teaching was the kick I needed to finish a project I have been toying with for a few months - a DIY 'Stream Deck'. If you haven't heard of Stream Deck, it's a desk macro controller for online broadcasters. The smallest version, the Stream Deck Mini has two rows of three buttons. These can be used to perform different tasks while you are live streaming - and they can be easily customised. They look like great fun and I'm sure I could find a use for one on the bench, but where's the fun in buying when you can make!
Our macro keyboard is going to be really simple compared to the Stream Deck and it won't have nice LCD keys, but it can be made at home and for a fraction of the cost. The macro keyboard could be used for shortcuts in PowerPoint, your soft-phone if you are dialing into work from your laptop, web conferencing (Zoom, etc), smart-home control... there are lots of options!
Plan
To keep things simple I'm just going to make a small device with just a couple of rows of buttons. The biggest feature I require is being able to customise the buttons so they work on different programs, so they will map differently for Teams, Jitsi and PowerPoint for example.
This could be done a number of different ways - the keys could be programmed on the micro-processor itself and a button used to change programs, or using Function keys 13-24. You have probably never seen or used F13-24 before, as they don't normally exist on the keyboard; this is good for us as they are rarely mapped inside programs and we can use software on our computer to map the function keys to different keystrokes, so this is what we will use.
Choosing a micro-controller for this project is pretty easy, too. The Arduino Pro Micro is based on the ATmega32U4, with 12 inputs and a built in USB which is recognised as a HID input. This means, when you trigger an input, you can have the Arduino board send a signal to your computer, just like a keyboard would. They can be purchased for around €6 each if buying single units
Be careful when purchasing these that you actually get a 'pro micro', some Amazon listings appear and look similar, but aren't the ATmega32U4 chip.
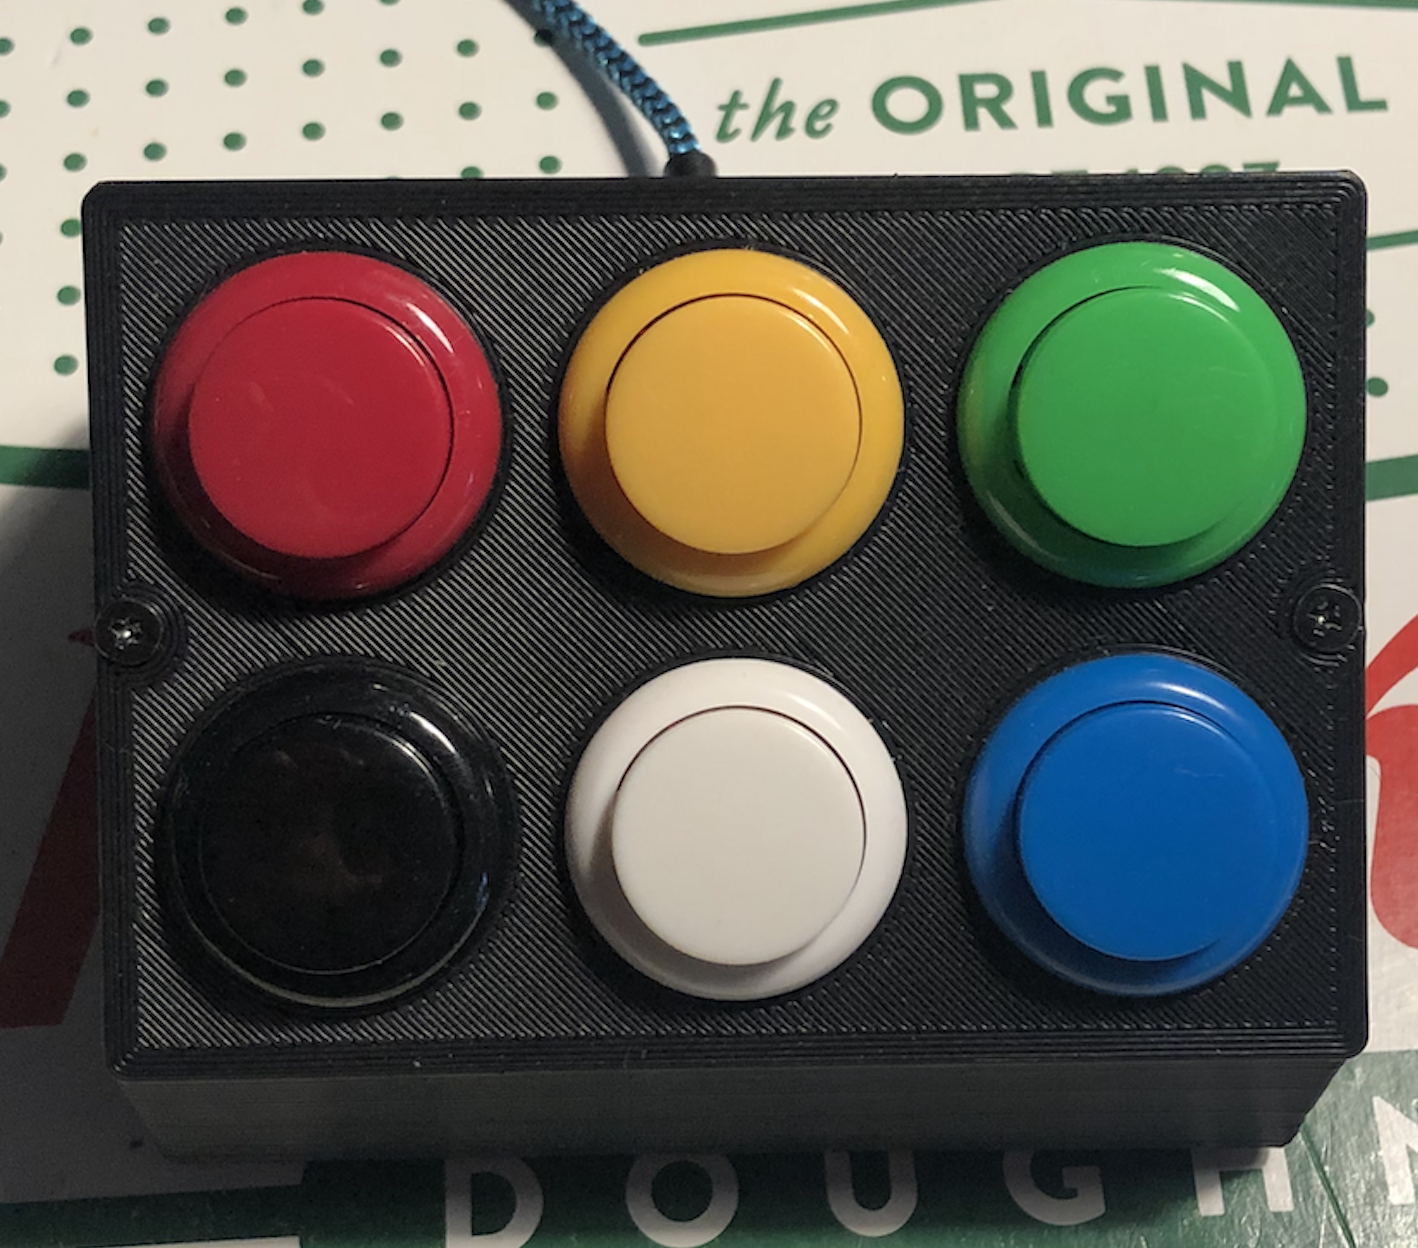
I decided to use arcade buttons for my project. They can be purchased cheaply, they come in a number of different colours, and they're really easy to pop out and replace if necessary.
Materials
- 1 x 3D Printed Case
- 1 x Arduino Pro Micro (may require soldering)
- 6 x Arcade buttons
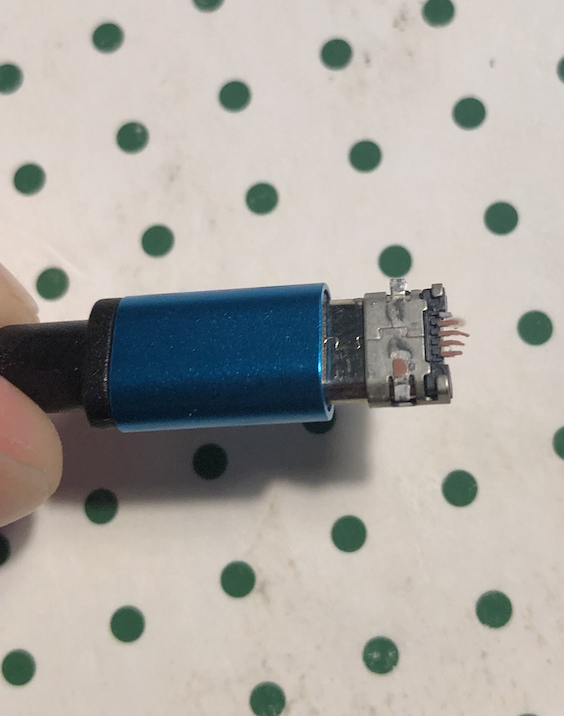
- 1 x Micro USB Cable (I should have ordered a USB-C to micro-USB)
- Dupont cables
I managed to get all the materials I need for under €20. The 6 button Stream Deck on Amazon is priced at £110.83 - that's quite a difference!
When I ordered arcade buttons from Amazon, the best option I had was a bag of 24 - so I have 18 extra buttons - if you're in Europe get in touch and I will send you some!
Design
I recently started using Fusion360 to learn how to make 3D designs. I used to use AutoCad for 2D electrical schematics in work, but I had never dabbled in 3D except for TinkerCAD. Thankfully I found some great YouTube tutorials to get me started, big shout to Lars Christensen. Once you get started in Fusion (and his advice to use keyboard shortcuts does help!) it really isn't that daunting.


I also got some advice and help from friends who use and teach 3D CAD professionally to get moving on my DIY keyboard design! Thanks for your patience, lads!
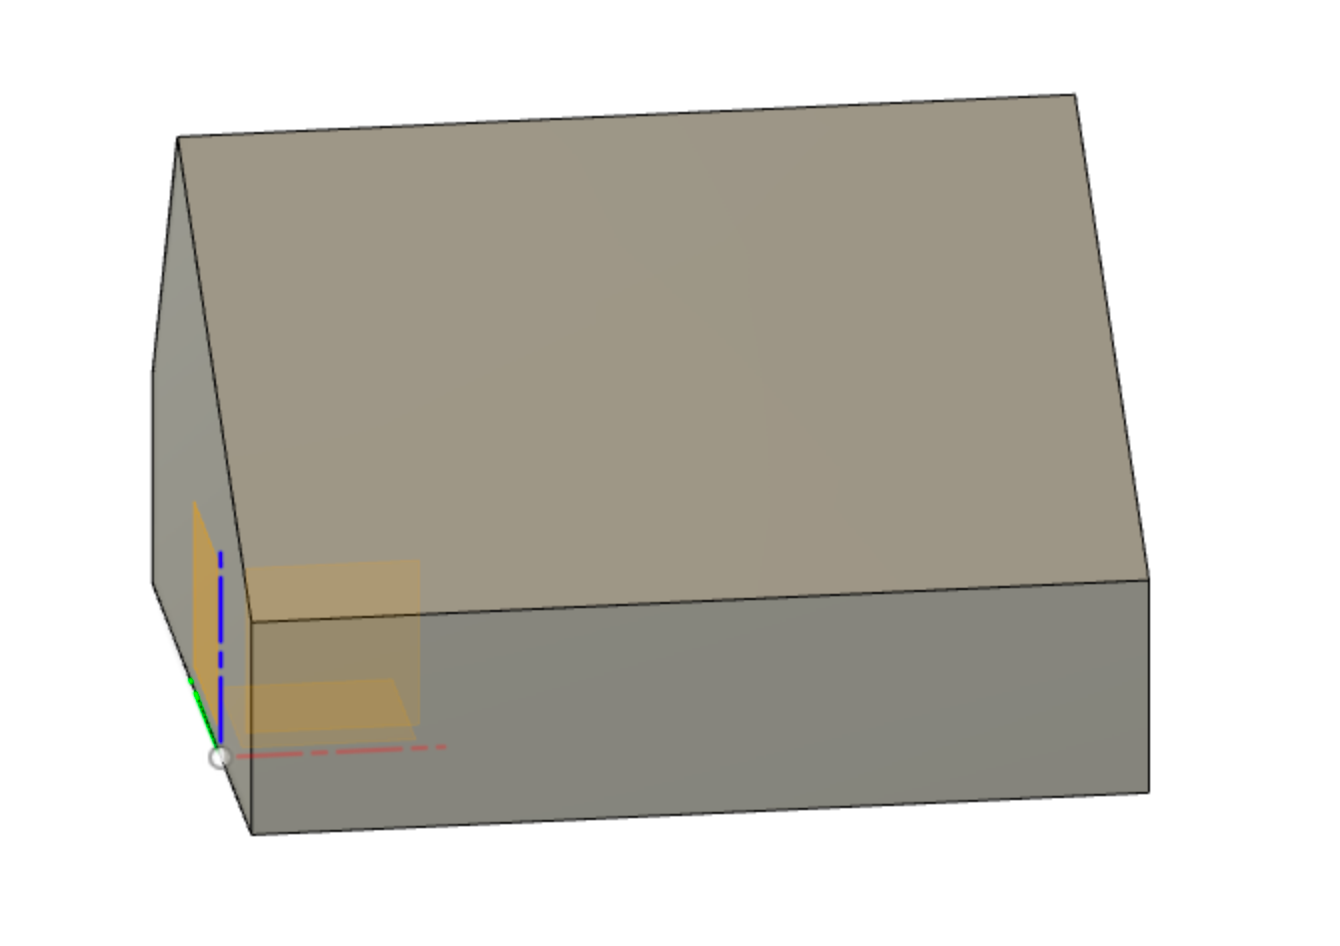
I started off by creating a 2D sketch of straight lines that would be the base of my design. I needed to ensure there would be sufficient depth for the arcade button, plus the terminals. This meant the height would be 25mm from base to the lid.
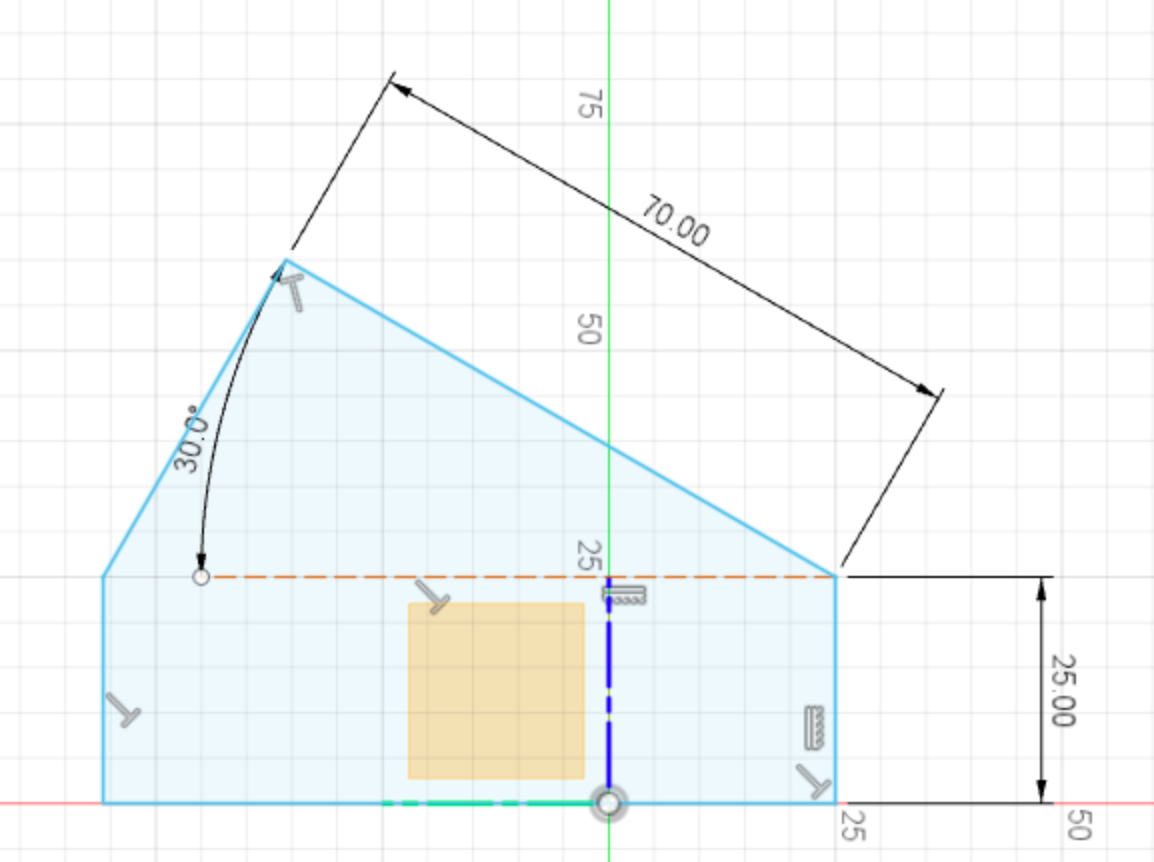
Once the 2D sketch design was made, I extruded it by 100mm. It's starting to take shape just by completing a 2D sketch and extrusion!
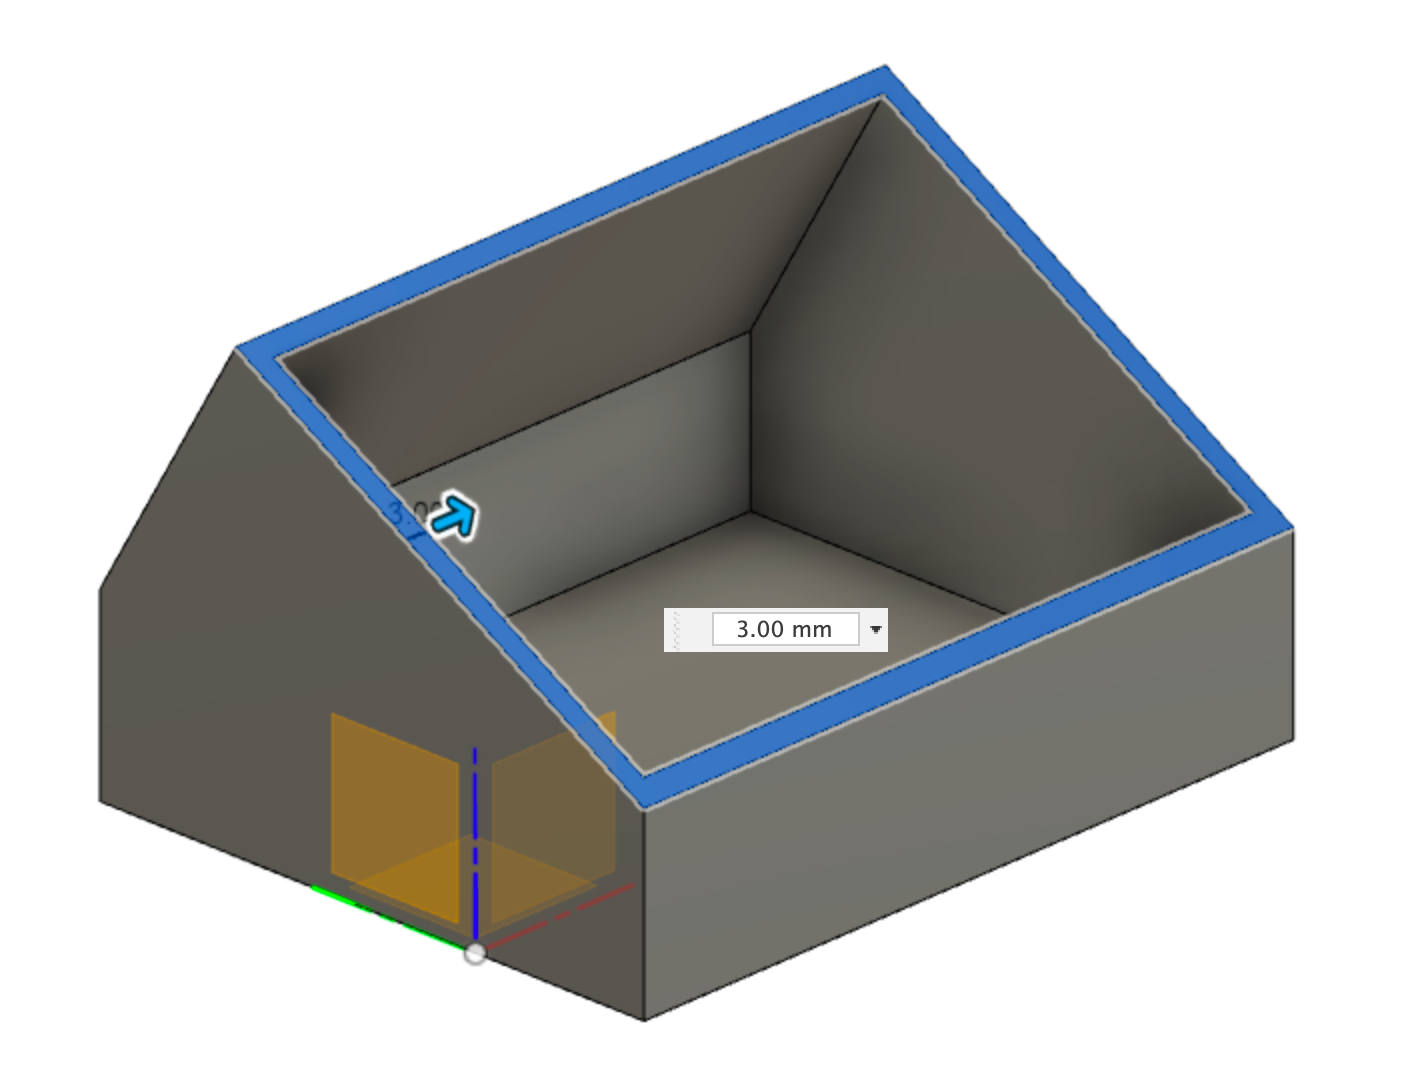
The shell command comes in handy for making the design hollow.
Using the extruder tool, the inside was only extruding from the flat faces, so it was causing uneven inner surfaces as I went - by using the shell command and selecting the top face, '3mm' inner thickness will give you the following result;
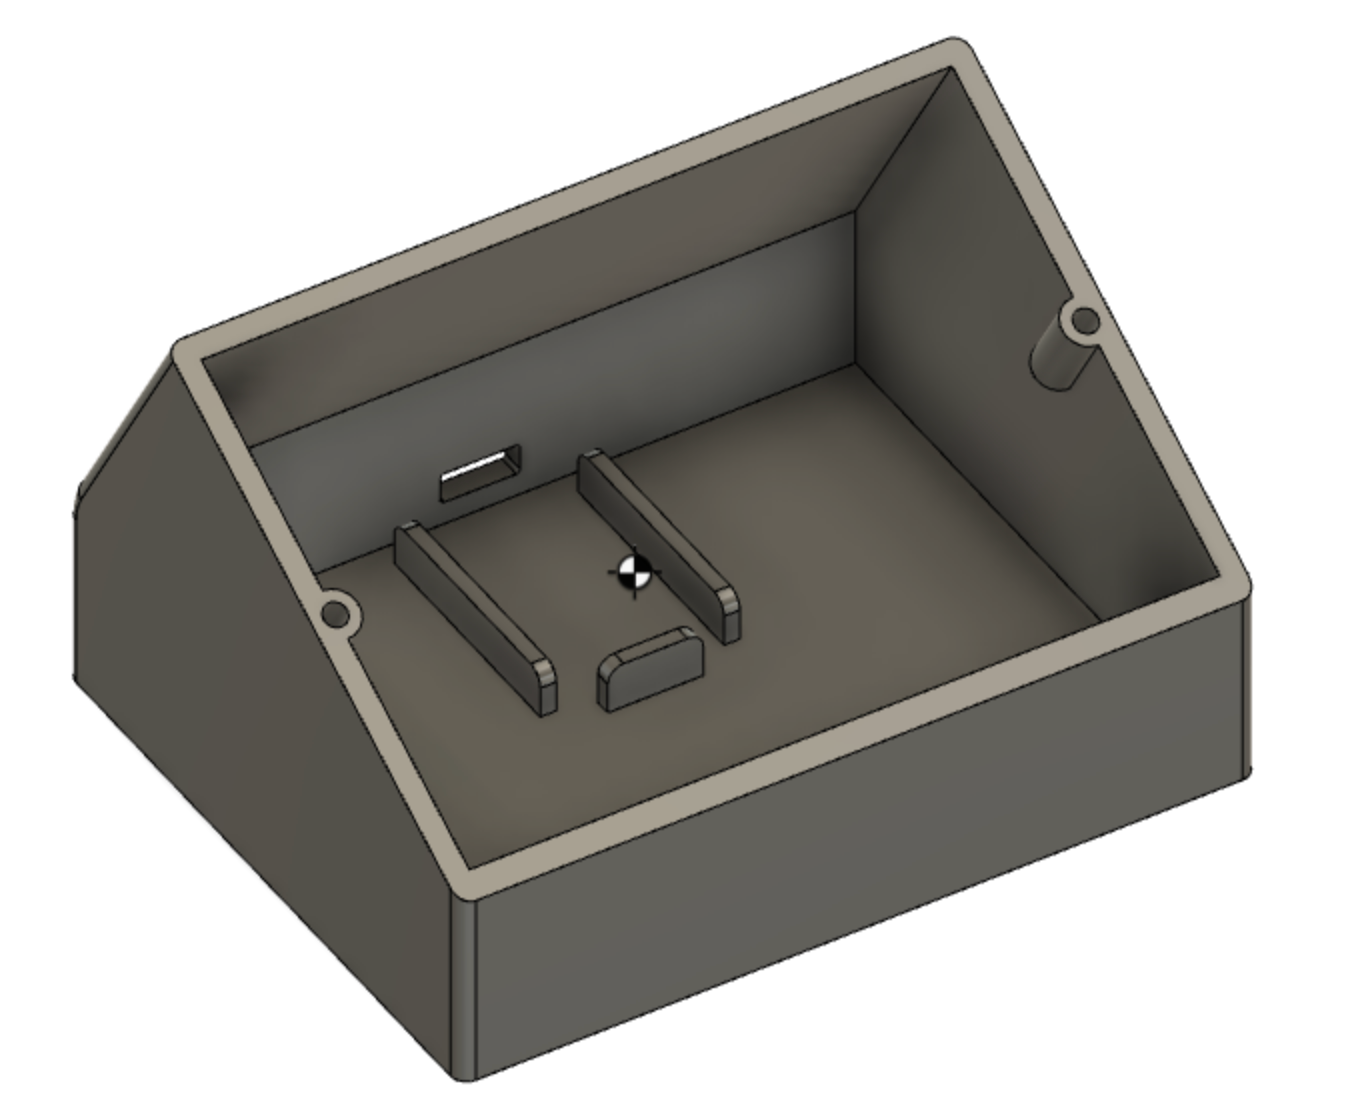
Once this was completed, I returned to the tutorial from Lars for adding some fixing holes for the screws and a basic lid with holes for the screws. Once this was done, I did some work with the fillet tool to round off the edges to give a nicer finish.
A hole was required for the cable to exit from the micro-controller. I also added a few brackets to hold the Arduino in place. I oversized the section for the Arduino as I wasn't sure of the exact dimensions, and I wanted a bit of room to ensure the USB cable would be able to connect (in case I had made a mess of the position of the cable hole from the the base). I was happy to glue the Arduino in place if it was too big, but it's not necessary!
Now to move on to the lid!
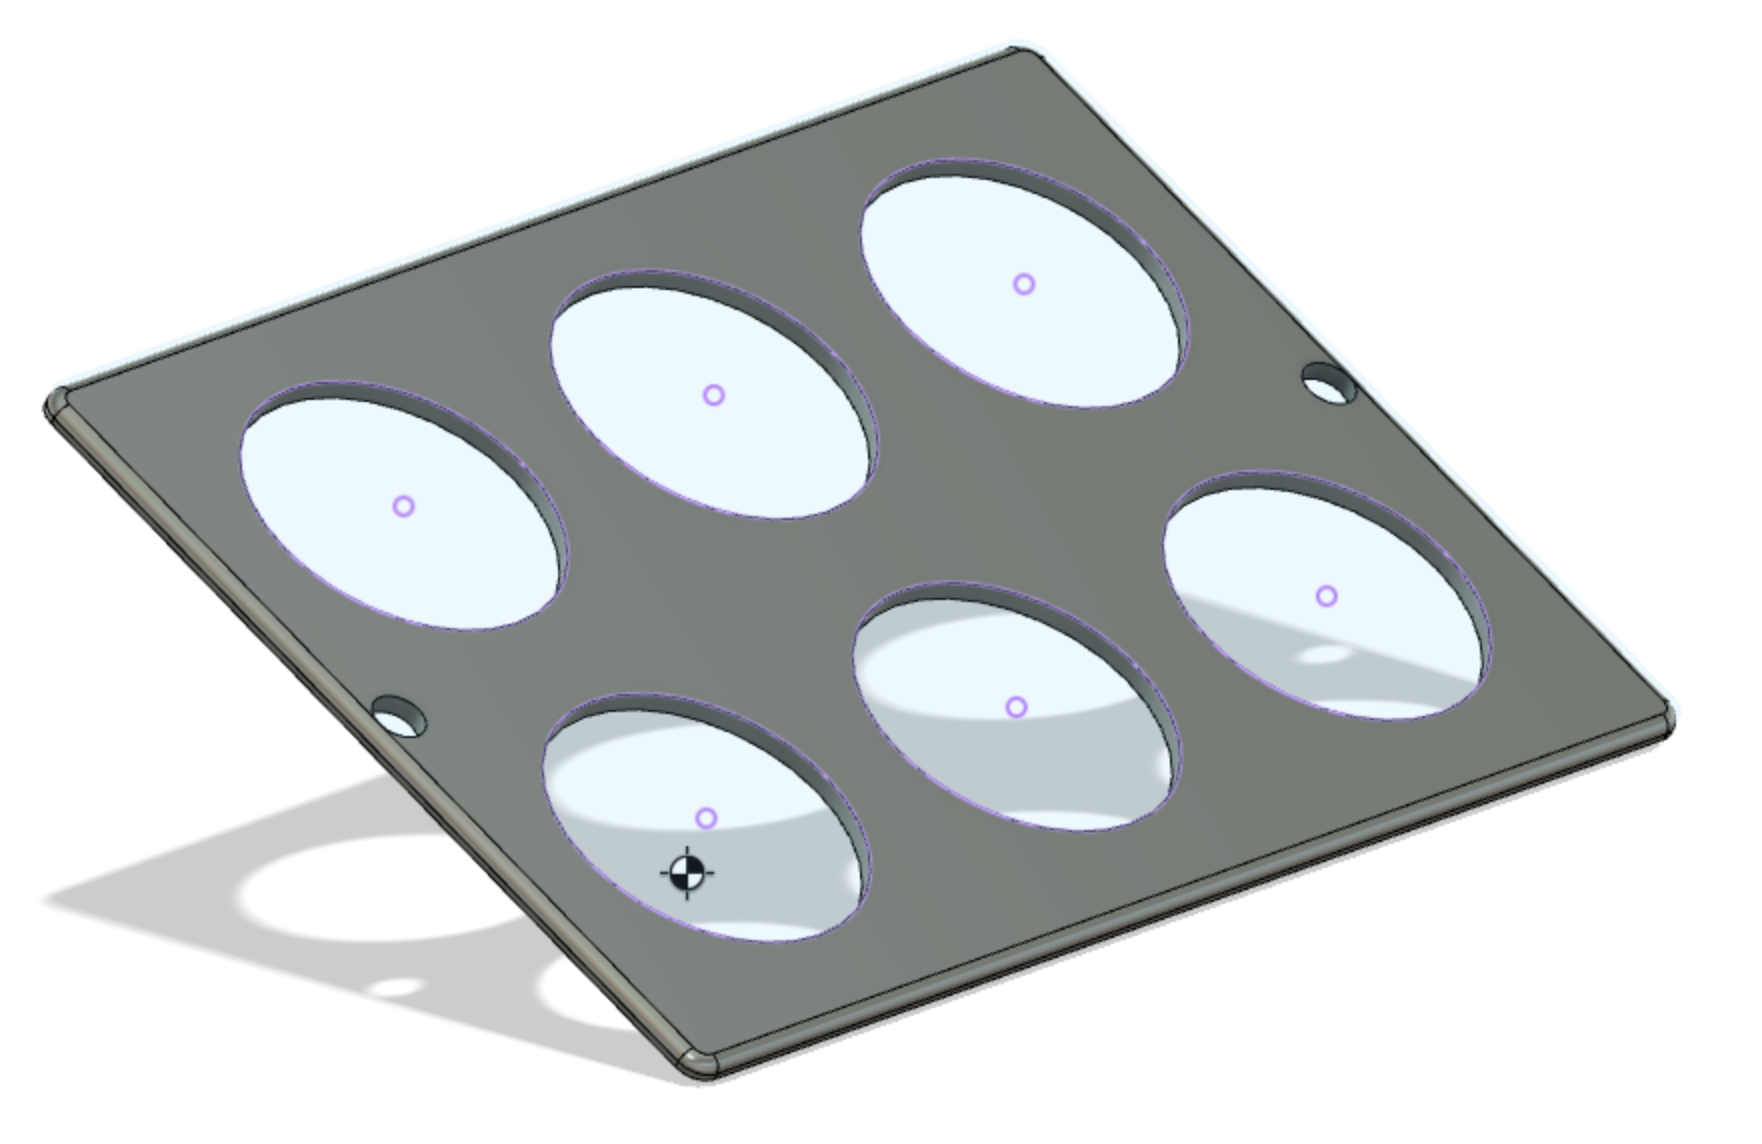
I created 6 holes in the required position. I used construction lines to get the position for the hole mid-point just right. I am sure there are more advanced or better ways of doing this, but the use of the mid-point on construction lines was very helpful for making everything even.
Once the holes for the arcade buttons were added, I created two lips on the top and bottom of the lid to hold it roughly in place before screws are put in place. A final run with the fillet tool gives a rounded finish to the lid.

If you want to try out this design, the finished 3D print files can be downloaded from Thingiverse;
 Thingiverse.com
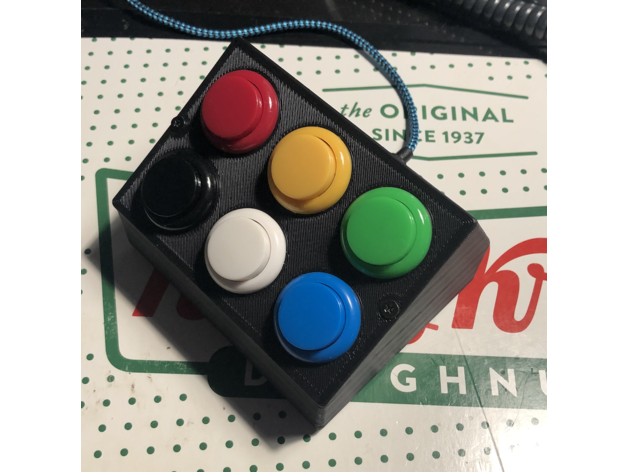
Build
Building the macro keyboard is very easy!
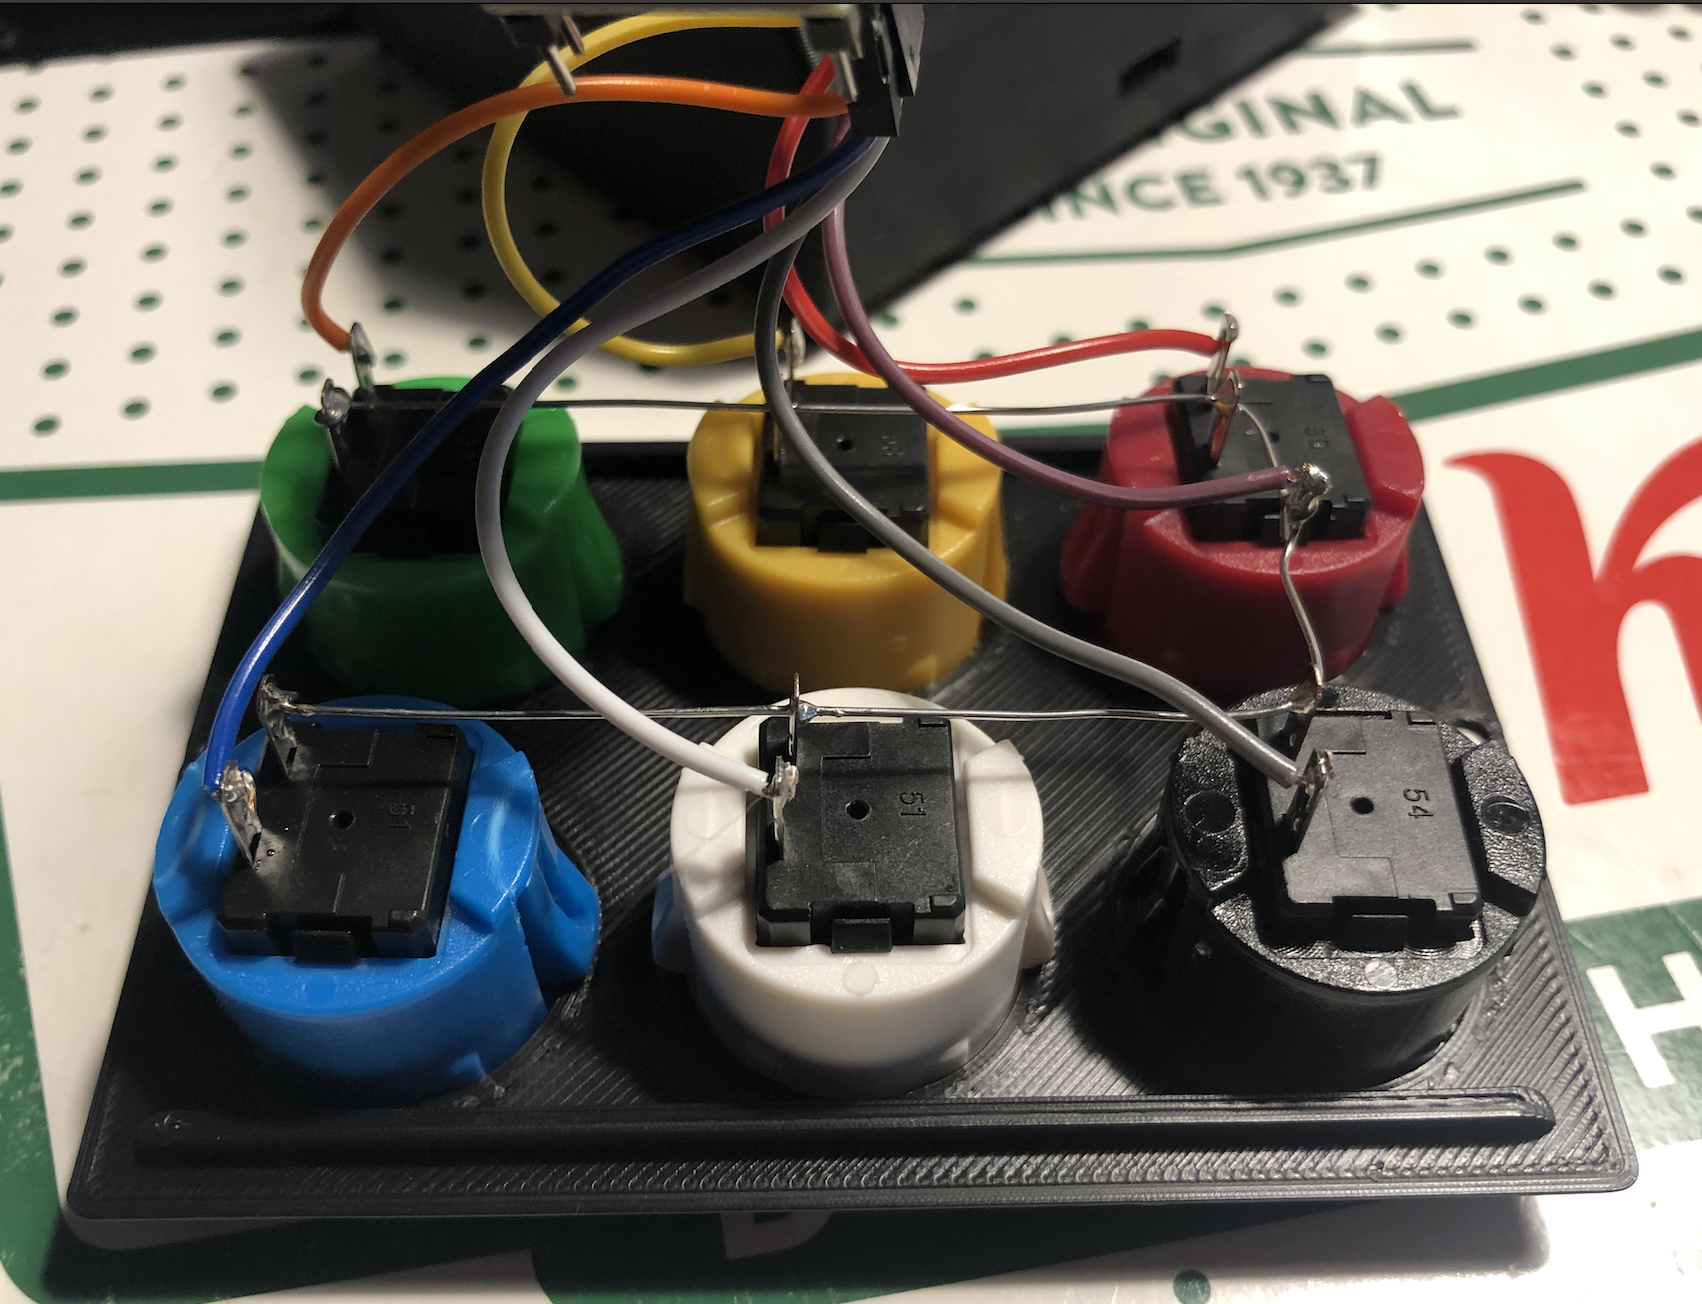
- Insert the arcade buttons into the holes - try to keep all the terminals facing the same direction.
- Solder the left or right pin of all the devices with a shared piece of wire. This can be connected to the GND pin of the Arduino
- Solder the other pin to a cable and connect them to the board. I would recommend putting the top left button as pin '2', and move across the board. That way the keys should be in sequence F13 onwards.
- Connect the Micro USB, place the Arduino in the cut out on the base and screw the lid on!
In my example above, the top row has the right pin interconnected as a ground line, then going to the purple cable which is connected to GND. It also joins to the left pin on all the buttons on the lower row.
Each button also has a cable going to the Arduino. I have used pins 2 through 7 for the buttons (there is no pin 1 on the Arduino!)
Arduino Code
David Madison has kindly provided code that can be uploaded to the Arduino using the Arduino IDE. This code will work for eight buttons, but it actually makes no difference that we are only using six.
/*
 *  Project     'Stream Cheap' Mini Macro Keyboard
 *  @author     David Madison
 *  @link       partsnotincluded.com/electronics/diy-stream-deck-mini-macro-keyboard
 *  @license    MIT - Copyright (c) 2018 David Madison
 *
 * Permission is hereby granted, free of charge, to any person obtaining a copy
 * of this software and associated documentation files (the "Software"), to deal
 * in the Software without restriction, including without limitation the rights
 * to use, copy, modify, merge, publish, distribute, sublicense, and/or sell
 * copies of the Software, and to permit persons to whom the Software is
 * furnished to do so, subject to the following conditions:
 *
 * The above copyright notice and this permission notice shall be included in
 * all copies or substantial portions of the Software.
 *
 * THE SOFTWARE IS PROVIDED "AS IS", WITHOUT WARRANTY OF ANY KIND, EXPRESS OR
 * IMPLIED, INCLUDING BUT NOT LIMITED TO THE WARRANTIES OF MERCHANTABILITY,
 * FITNESS FOR A PARTICULAR PURPOSE AND NONINFRINGEMENT. IN NO EVENT SHALL THE
 * AUTHORS OR COPYRIGHT HOLDERS BE LIABLE FOR ANY CLAIM, DAMAGES OR OTHER
 * LIABILITY, WHETHER IN AN ACTION OF CONTRACT, TORT OR OTHERWISE, ARISING FROM,
 * OUT OF OR IN CONNECTION WITH THE SOFTWARE OR THE USE OR OTHER DEALINGS IN
 * THE SOFTWARE.
 *
 */

// ---------------------------------
// Key definitions
#define BUTTON_KEY1 KEY_F13
#define BUTTON_KEY2 KEY_F14
#define BUTTON_KEY3 KEY_F15
#define BUTTON_KEY4 KEY_F16
#define BUTTON_KEY5 KEY_F17
#define BUTTON_KEY6 KEY_F18
#define BUTTON_KEY7 KEY_F19
#define BUTTON_KEY8 KEY_F20

// Pin definitions
#define BUTTON_PIN1 2
#define BUTTON_PIN2 3
#define BUTTON_PIN3 4
#define BUTTON_PIN4 5
#define BUTTON_PIN5 6
#define BUTTON_PIN6 7
#define BUTTON_PIN7 8
#define BUTTON_PIN8 9
// ---------------------------------

#include "Keyboard.h"

// Button helper class for handling press/release and debouncing
class button {
  public:
  const char key;
  const uint8_t pin;

  button(uint8_t k, uint8_t p) : key(k), pin(p){}

  void press(boolean state){
    if(state == pressed || (millis() - lastPressed  <= debounceTime)){
      return; // Nothing to see here, folks
    }

    lastPressed = millis();

    state ? Keyboard.press(key) : Keyboard.release(key);
    pressed = state;
  }

  void update(){
    press(!digitalRead(pin));
  }

  private:
  const long debounceTime = 30;
  unsigned long lastPressed;
  boolean pressed = 0;
} ;

// Button objects, organized in array
button buttons[] = {
  {BUTTON_KEY1, BUTTON_PIN1},
  {BUTTON_KEY2, BUTTON_PIN2},
  {BUTTON_KEY3, BUTTON_PIN3},
  {BUTTON_KEY4, BUTTON_PIN4},
  {BUTTON_KEY5, BUTTON_PIN5},
  {BUTTON_KEY6, BUTTON_PIN6},
  {BUTTON_KEY7, BUTTON_PIN7},
  {BUTTON_KEY8, BUTTON_PIN8},
};

const uint8_t NumButtons = sizeof(buttons) / sizeof(button);
const uint8_t ledPin = 17;

void setup() {
  // Safety check. Ground pin #1 (RX) to cancel keyboard inputs.
  pinMode(1, INPUT_PULLUP);
  if(!digitalRead(1)){
    failsafe();
  }

  // Set LEDs Off. Active low.
  pinMode(ledPin, OUTPUT);
  digitalWrite(ledPin, HIGH);
  TXLED0;

  for(int i = 0; i < NumButtons; i++){
    pinMode(buttons[i].pin, INPUT_PULLUP);
  }
}

void loop() {
  for(int i = 0; i < NumButtons; i++){
    buttons[i].update();
  }
}

void failsafe(){
  for(;;){} // Just going to hang out here for awhile :D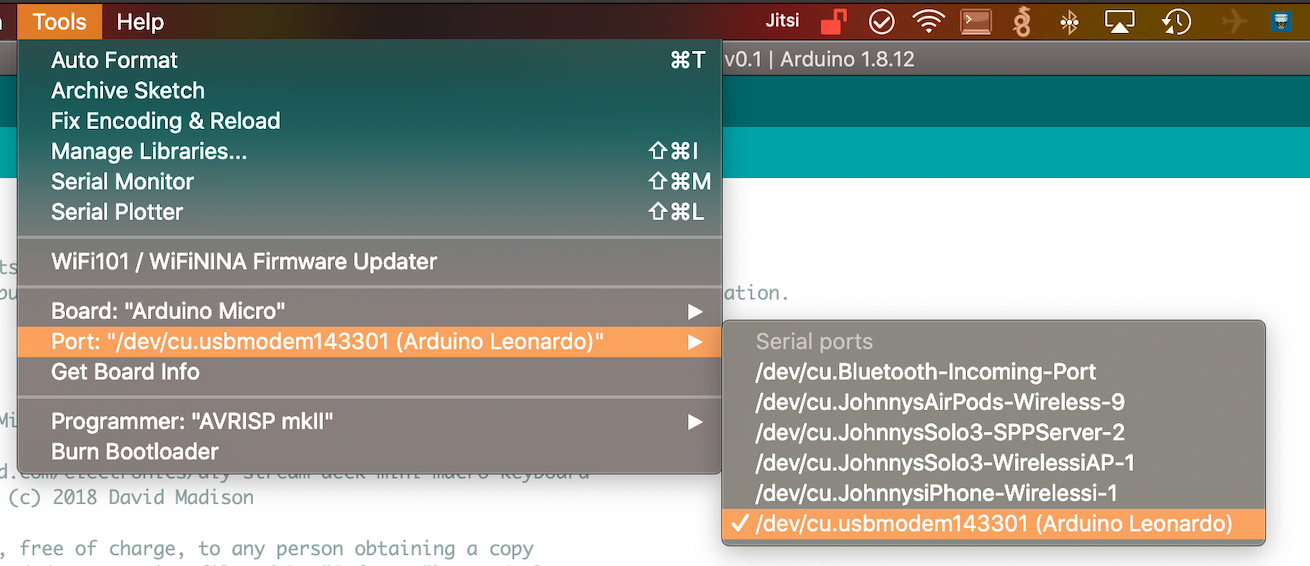
}If you haven't used the Arduino IDE before, you probably need to set it up for the Arduino board you are using. You will need to set 'Board' to 'Arduino Micro' and the port in use. See the example below;
Mapping the buttons
As I use a MacBook day to day, I needed a software tool installed that would map F13-24 to a shortcut in the software I'm using.
I did some research and found Karabiner-Elements. It's a great piece of software and deals with both single-press, multiple key presses & long-press events, though the you will meed more 'advanced' configuration for multiple key presses and long-press.
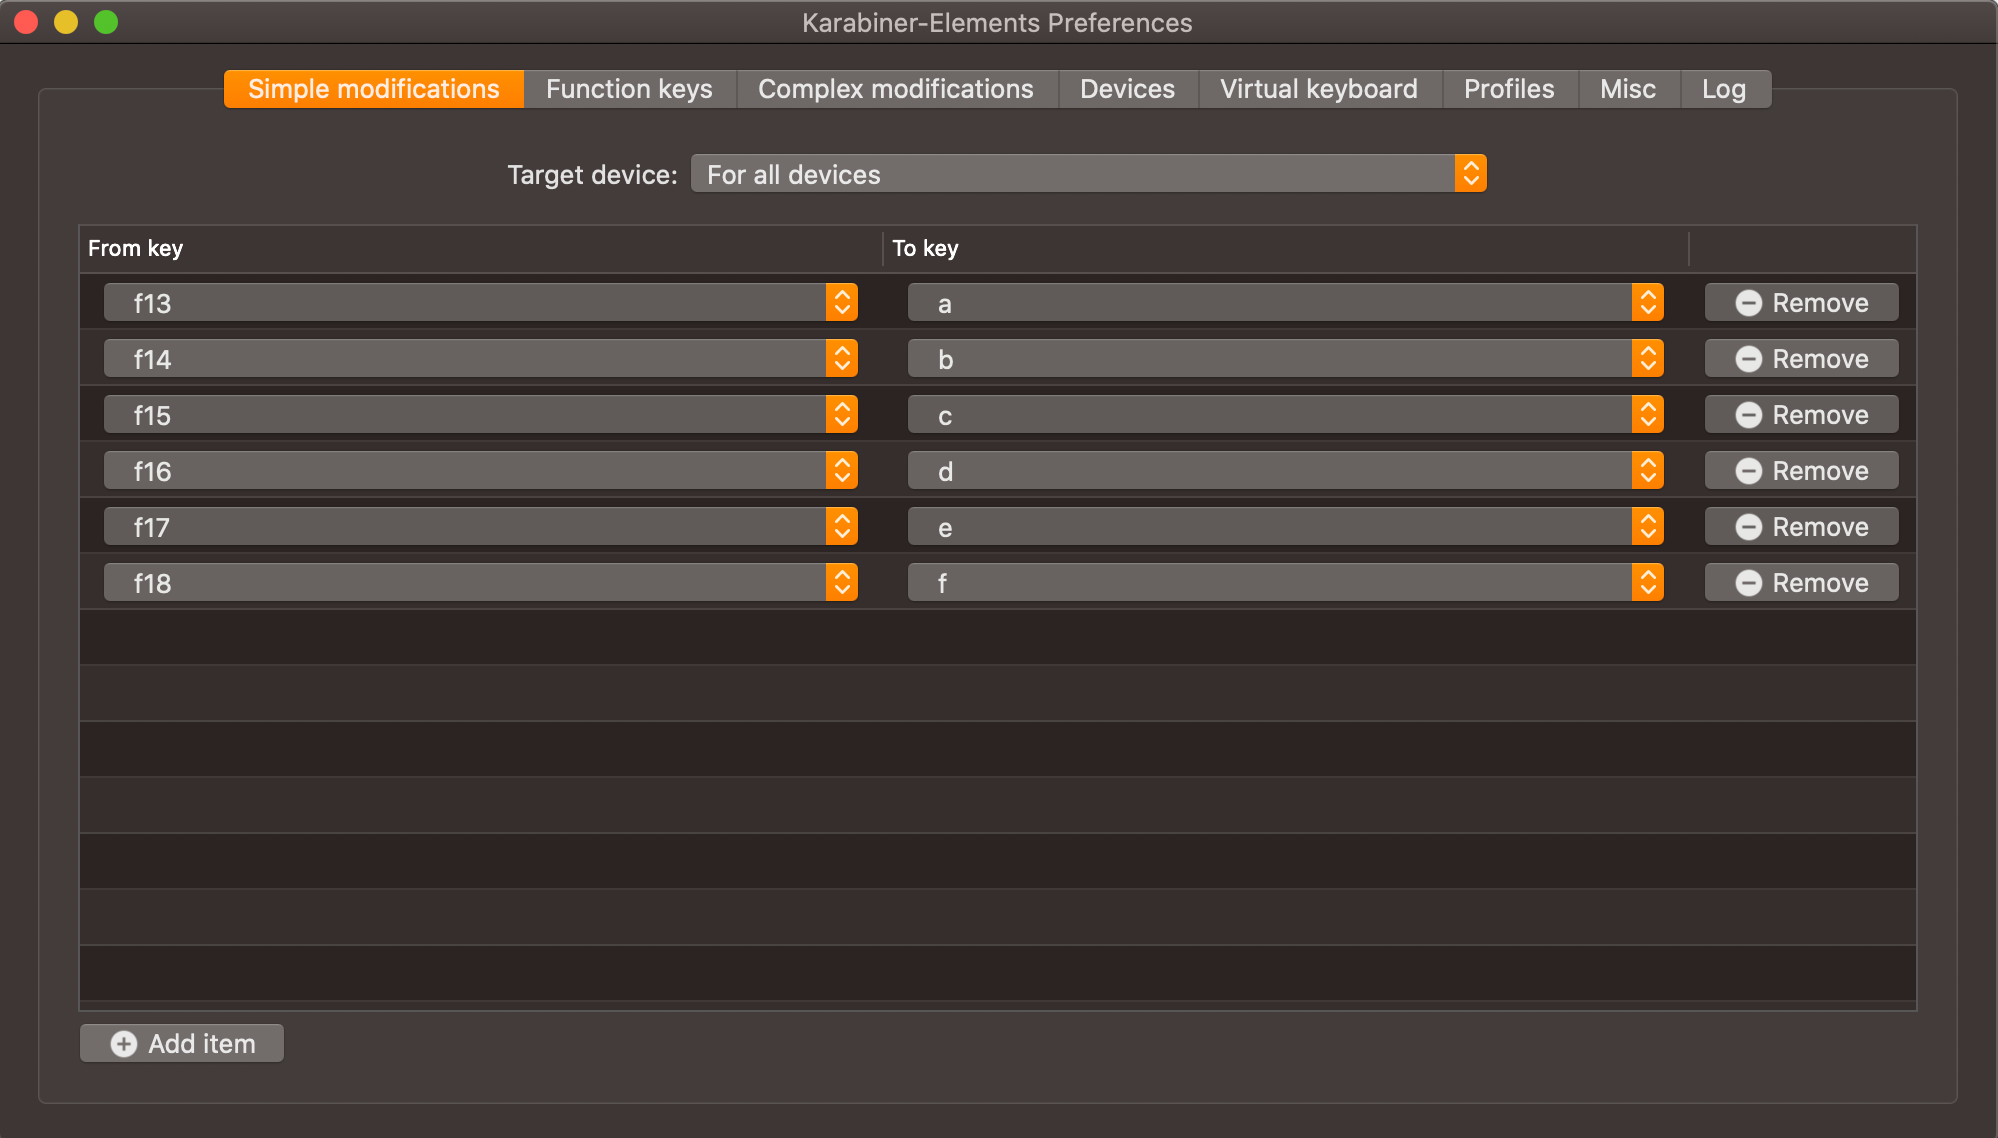
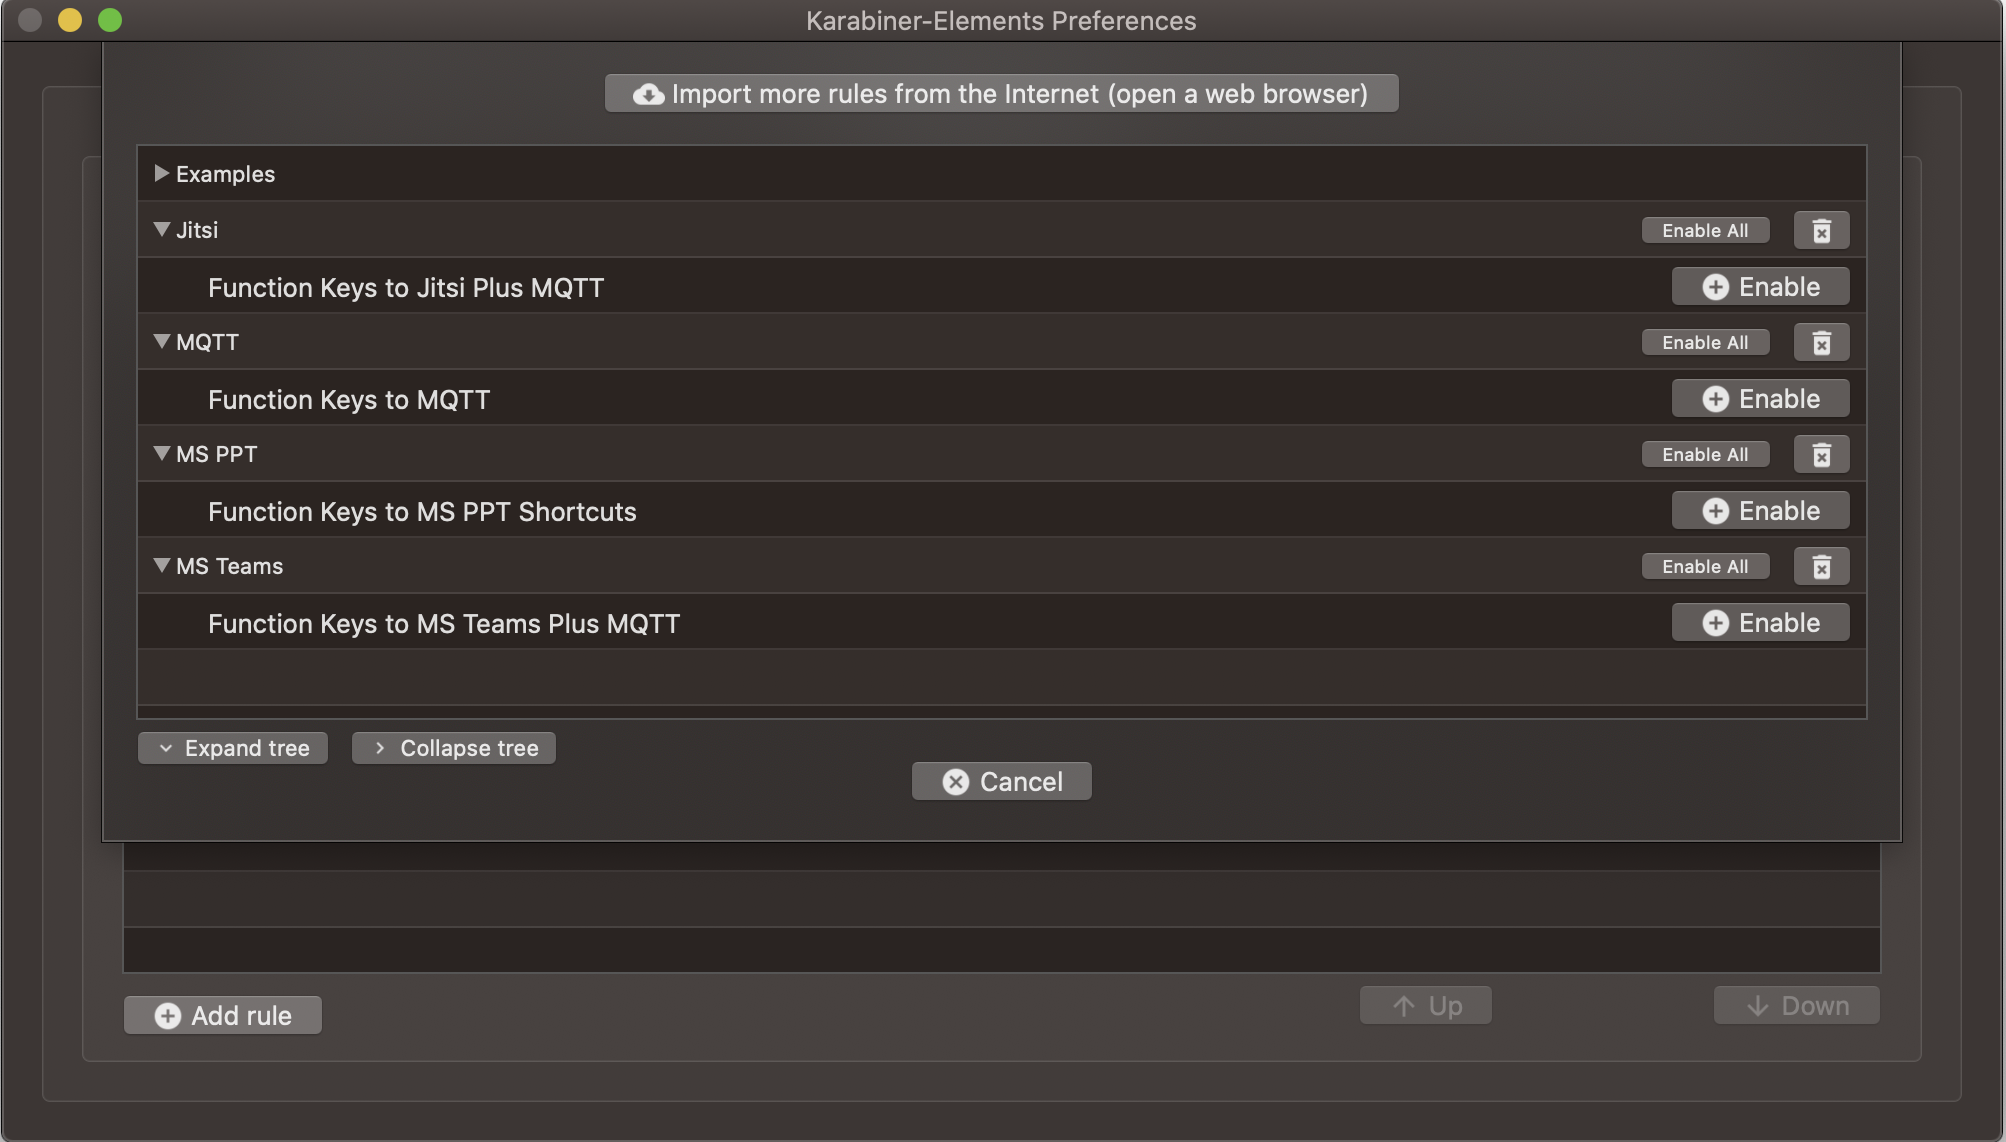
Once Karabiner is installed, you'll want to open it up and set up a few profiles. I have created a profile for Teams, Jitsi & PowerPoint (plus a test one for MQTT... you'll see why later!)
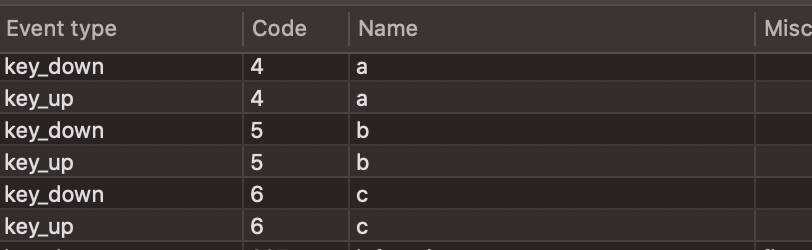
This test profile maps F13-18 to letters 'a' through 'f'. You can map these to any character you like. If you use Jitsi for example, 'v' will toggle your video stream, or 'm' will mute your microphone. A simple configuration can be completed using the Karabiner app.
If you encounter any issues throughout the configuration or testing, open up Karabiner EventViewer. If the icon or profile name isn't showing in your menu bar, you'll find EventViewer in Launchpad. With this app, you can see keypresses - it will show the output which is mapped from Karabiner if you have added a modification.
If you want to have multiple keys presses mapped for a button, this can be done too but requires a slightly more advanced configuration. To do this, you can create a complex modification file. These are located in '~/.config/karabiner/assets/complex_modifications'.
These two links will explain how the complex modifications go together!
An example modification file might look like this;
{
  "title": "Jitsi",
  "rules": [
    {
      "description": "Function Keys to Jitsi Plus MQTT",
      "manipulators": [
        {
          "from": {
            "key_code": "f13"
          },
        "parameters": {
            "basic.to_if_alone_timeout_milliseconds": 250,
            "basic.to_if_held_down_threshold_milliseconds": 250
        },
        "to_if_alone": [
          {
            "key_code": "2",
            "modifiers": [
              "left_command"
            ]
          }
        ],
        "to_if_held_down": [
            {
              "shell_command":"osascript /Users/Username/Desktop/Workbench/Macro-Keyboard/red.scpt"
            }
        ],
        "type": "basic"
      },
        {
          "from": {
            "key_code": "f18"
          },
          "parameters": {
              "basic.to_if_alone_timeout_milliseconds": 250,
              "basic.to_if_held_down_threshold_milliseconds": 250
          },
          "to_if_alone": [
            {
              "key_code": "s"
            }
          ],
          "to_if_held_down": [
              {
                "shell_command":"osascript /Users/Username/Desktop/Workbench/Macro-Keyboard/blue.scpt"
              }
          ],
          "type": "basic"
        }
      ]
    }
  ]
}
A quick breakdown of this file:
- The title of your modification, it must be unique.
- The description will appear in Karabiner too, so make it something you'll recognise (as the title isn't shown).
- 'Manipulators' tell Karabiner what key to change, and what to change it to. The first half changes F13 to 'left command + 2' for a short press, and it launches a shell script if you hold the button down.
- Shell scripts need a bit of extra work. More info below!
Always run JSON through a linter before saving - it will save a lot of cursing when you realise you are missing something as simple as a comma! www.jsonlint.com
Shell Scrips + MQTT
I use my macro keyboard to control my Tower Light when I take a call. To do this, Karabiner opens a terminal window and runs a shell script. The shell script sends an MQTT message to Home Assistant and triggers the light with a customisable brightness and colour.
To run a terminal command from Karabiner requires three steps - Karabiner call > osascript > Shell script. Osascript will call an Apple Script, which can then open a terminal window. I spent longer than I will admit trying to Google-fu this to get it working.
We have covered what is required to get Karabiner configured - I used a long press in my example. Just change the location for the Apple Script location in the configuration above. Your Apple Script will look like this;
tell application "Terminal"
	activate
	do script "/bin/sh /Users/Username/Desktop/Workbench/Macro-Keyboard/green.sh"
end tell
delay 1
tell application "Terminal" to close (get window 1)Once Karabiner calls this script, it will open a terminal window, launch a shell script (green.sh), then close. The shell script looks like this;
#/bin/sh

mosquitto_pub -h ipaddr -u username -P password -t 'nodeTwr/lightset' -m '{state:ON,brightness:255,color:{r:0, g:255, b:0}}'Result
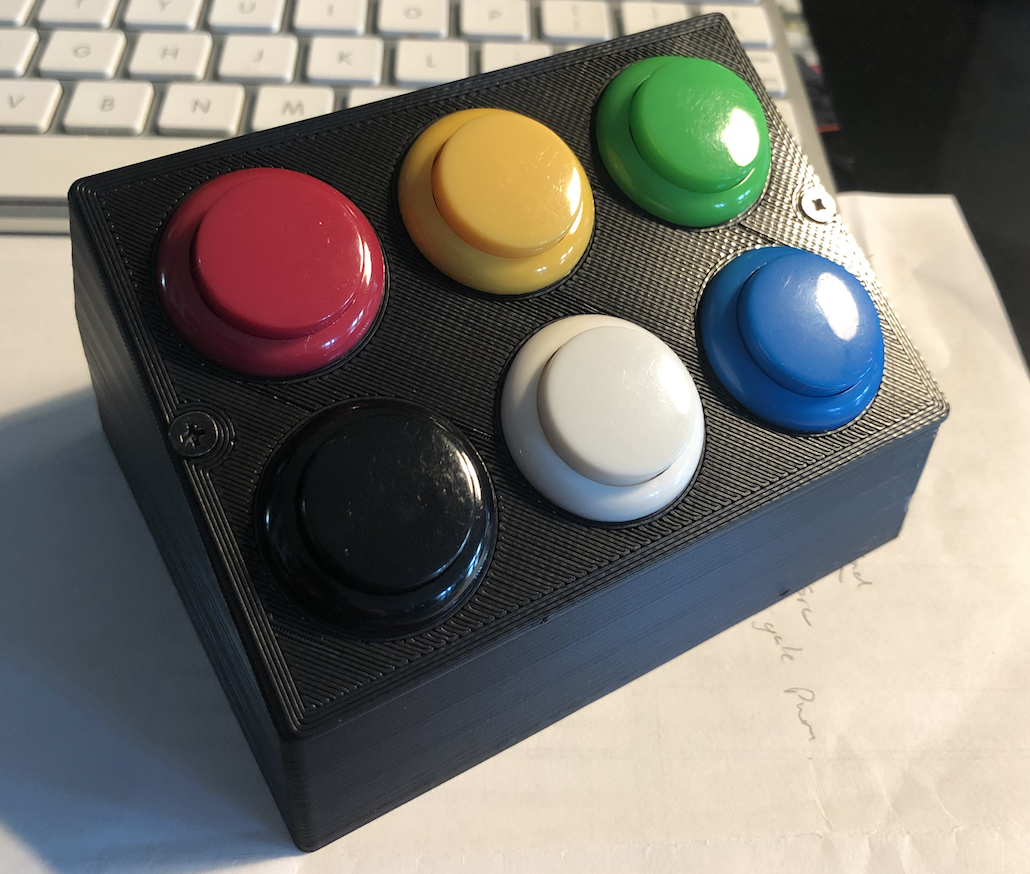
I'm quite pleased with the result! The buttons do occasionally register a double press if they aren't pushed fully down and they do feel quite cheap - which isn't a surprise really for €20 all-in!
If the button is pressed fully, it works perfectly. I find it much easier to mute and unmute using this keyboard than remembering a shortcut - to mute your microphone in Teams you must press Command+Shift+M at the same time... remembering to push the white button is much easier.
If you wanted to go down a simpler route, you could build a Push to Talk button like this... just don't use a red button and have it coming down your sleeve, you might end up in trouble;
Final advice
Don't do this...