BGP: Route48 with BGP
Part 3 of the BGP series: setting up BGP with Route48 on Mikrotik CHR & RouterOS7


Part three of BGP series… check out Part 4: RPKI with Mikrotik
Introduction to Route48 with BGP & requirements
Before starting, check out Part 2 of the BGP series: Route48 Tunnelbroker - we'll need the tunnel for the BGP traffic.

We will also need an AS number, or Autonomous System Number, for BGP - review Part 1 for more info.
Adding our ASN to R48
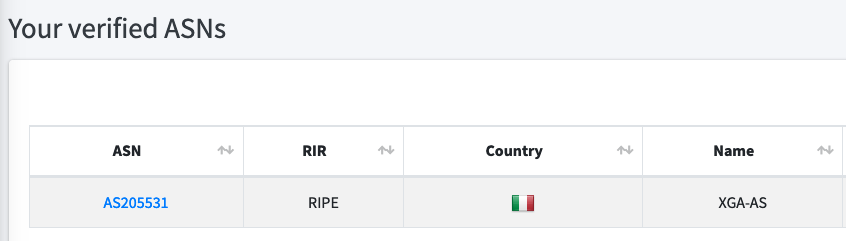
When you have obtained an ASN, return to Route48.org and set it up in the portal:

When the ASN is added and verified:
Adding Prefix
Next we can add our very own IPv6 prefix.
This prefix will be allocated to you from Route48's /32 allocation.
This allocation issued to you can also be tagged with your RIPE maintainer record, allowing you to make changes on the RIPE Portal.
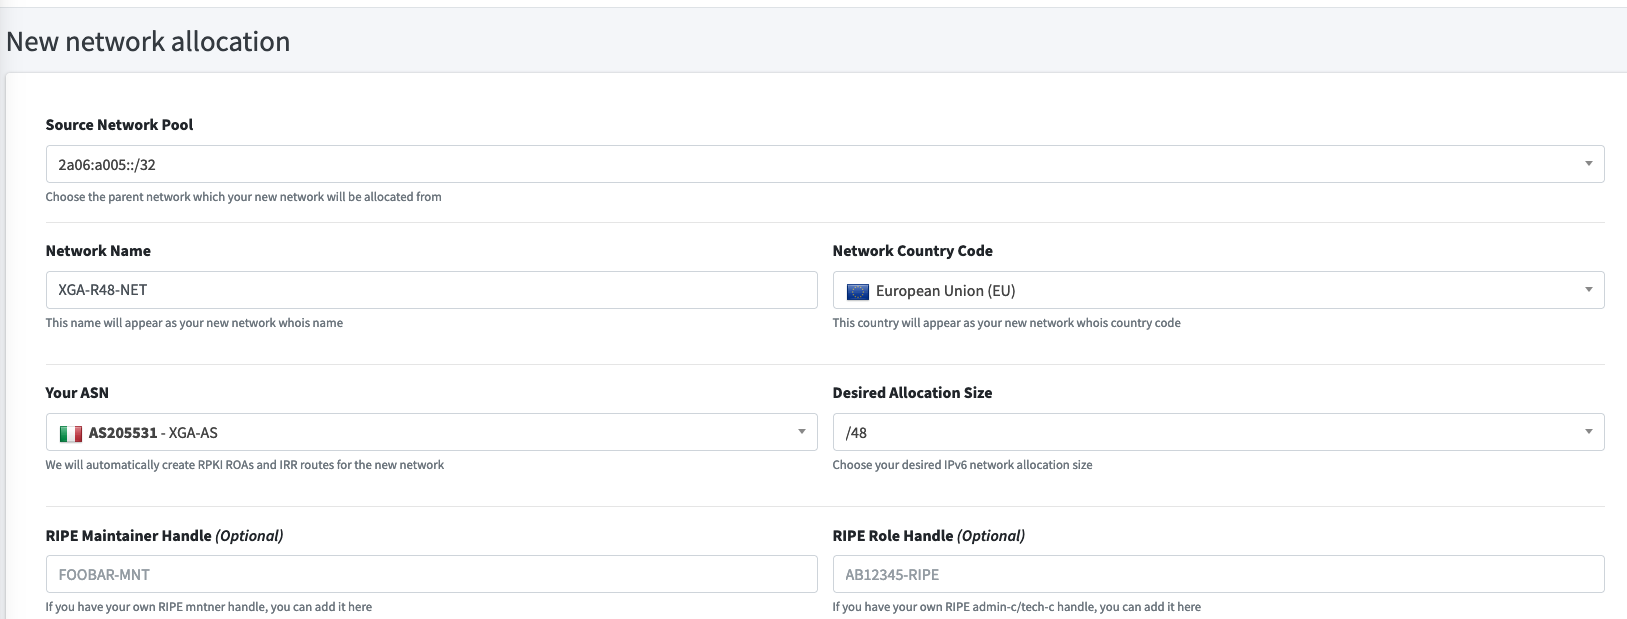
Add a network name, country code, select your ASN and pick the desired network size from /44 to /48.
If this is your first network or a test network, select the /48: this has enough to create 256 networks at /56, with another 256 networks at /64.
Typically a /56 could be used for a site, with a /64 for a subnet within that site: not much risk of running out of addresses with a /48 and it preserves addresses for others!
The RIPE chart for IPv6 subnets is particularly helpful for network sizing!
If you need to create your own Maintainer / Admin-Tech roles, check out the video from RIPE:
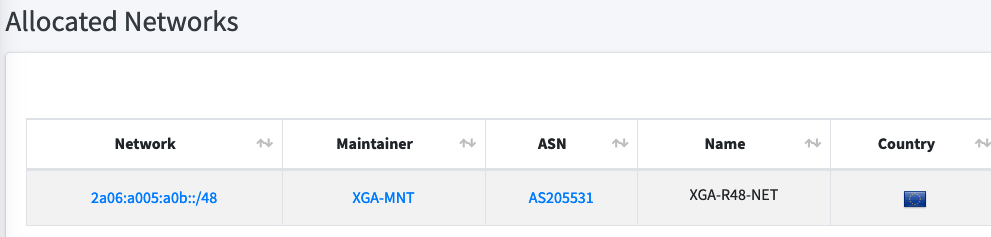
When you are done, you'll have your very own IPv6 subnet!
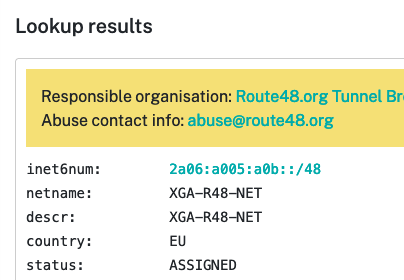
You can also locate it on the RIPE database: if you added a Maintainer, you'll be able to make changes (like the country, netname, descr), though this can also be completed using the Route48 site.
Adding BGP - Route48
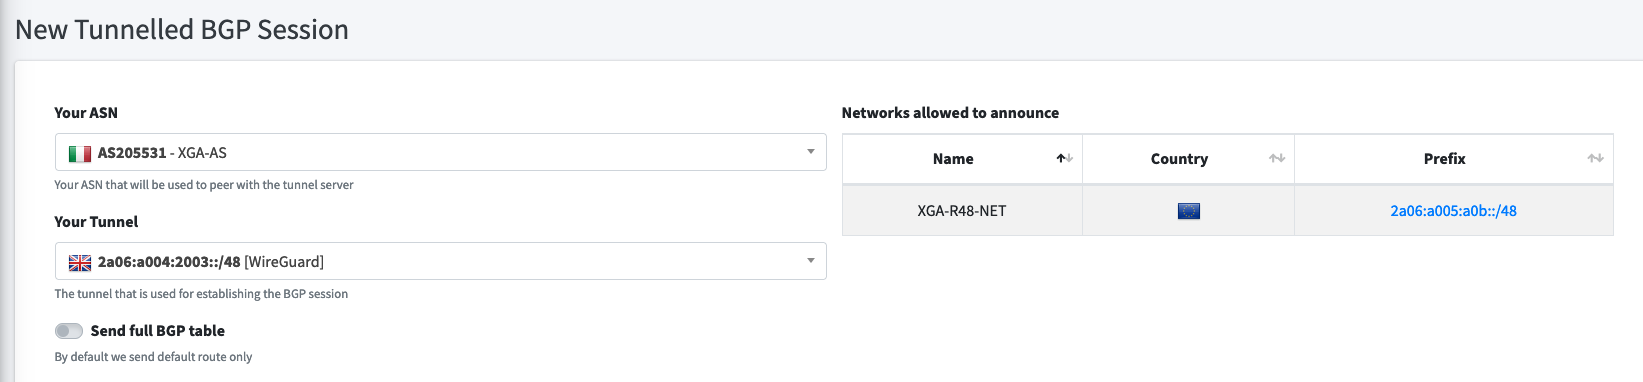
Next on the Route48 is the setup of the BGP session. Select your ASN & Tunnel created earlier.
For testing I recommend that you do not select the Send full BGP table option. The "full table" from your upstream will send approximately 150k routes to your router, so it knows exactly how to route traffic via the best route - this takes time and memory to process! Alternatively you can get the "default route", so all traffic is forwarded to your BGP upstream.
Traffic Engineering isn't really do-able with a default route, so multi-homed users will likely have a few views of the full table, allowing routing decisions to be made on a per-route basis!
I currently receive 151,221 routes from one upstream and 146,692 from another - this uses a bit of processing power to process and has memory implications.
Once the session is created on the Route48 site, we can set up the BGP session on the Mikrotik router.
Adding BGP - Mikrotik
The IP address of the route we're exporting must be added to an interface on our router. We can achieve this simply by adding the prefix address (including the /48) and telling the router not to advertise it using ND/RA.
/ipv6/address add address=2a06:a005:a0b::/48 interface=Route48-LON advertise=noTo export a route from Mikrotik, we need to add the route in the IPv6 Firewall (weirdly) as an Address-List. Note below we add the address being the /48 we were assigned in the last section - not an address relating to the tunnel. I have also named it BGP-ADVERTISE-LIST.
/ipv6/firewall/address-list add address=2a06:a005:a0b::/48 list=BGP-ADVERTISE-LISTFiltering when using BGP is very important. We don't want to export a route that we don't have permission to export. If our upstreams don't check the routes that we send to them, we could conceivably announce an address space we do not own... like Google, YouTube, Facebook, Twitter, Bank of America. As we do not wish to receive that traffic, nor want to land our upstream (Route48, or their sponsors) in hot water, we filter!
/routing/filter/rule add chain=BGP-FILTER-OUT rule="if (dst in 2a06:a005:a0b::/48) {accept;}"Once the above rule is added (and selected on the BGP connection), no other prefix will be allowed unless explicitly added.
After the address-list and filter have been added, we can finally add our BGP connection.
You will need to change a few of the commands below. Use your AS, local.address per your IPv6 tunnel endpoint (your end), remote.address as Route48 tunnel endpoint. If you used different filter names or address lists, use them here:
/routing/bgp/connection add address-families=ipv6 as=205531 local.address=2a06:a004:2003::2 .role=ebgp name=\
    BGP-Route48-LON output.filter-chain=BGP-FILTER-OUT .network=BGP-ADVERTISE-LIST \
    .no-client-to-client-reflection=yes remote.address=2a06:a004:2003::1/128 .as=44570 router-id=\
    127.0.0.1 routing-table=main
The BGP session will now attempt to connect!
Checking the config - Mikrotik
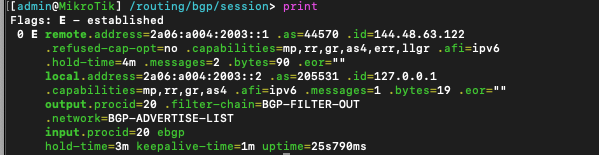
You can check the session by running the command /routing/bgp/session print - you hope to see E beside the session details, denoting an established connection.
We can also check that the IPv6 default route or full table have been received in the routing table via BGP, using the command /ipv6/route print where distance=20 (BGP routing distances are 20, so only BGP received routes will appear here).

Checking the config - Route48
Visiting the BGP sessions page, you can view the number of exported routes. If this shows 0, there's an error in your configuration and you should review all points above.
Pay particular attention to CIDR notation (where you see /48).
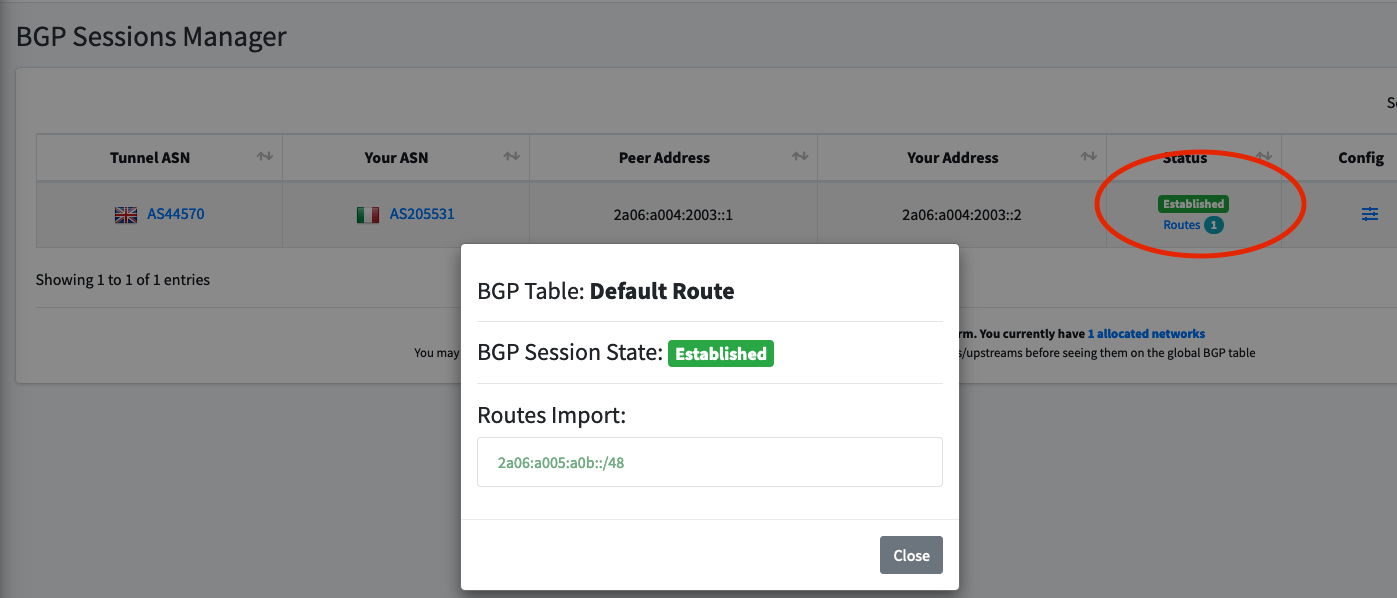
If your filters are failing, you can expect to see amber routes in the 'routes import' list, where an invalid route has been sent to the upstream and captured by Route48.
Checking the config - bgp.tools
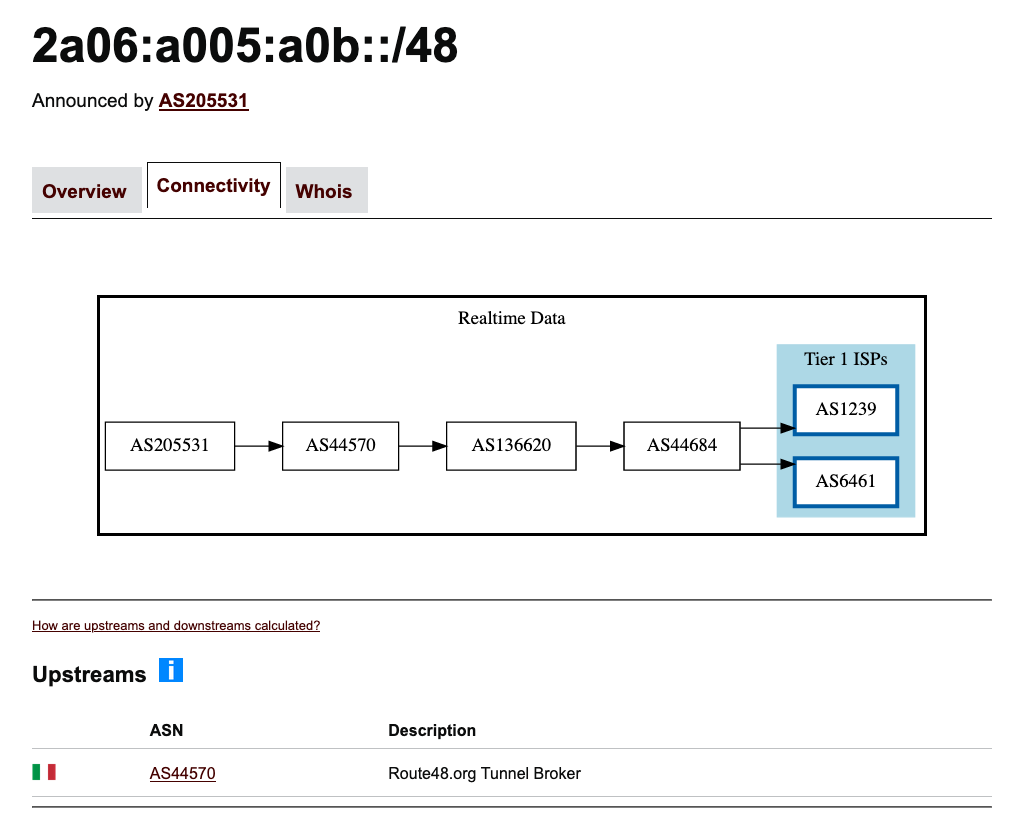
BGP.tools is an extraordinary website for checking your BGP announcements and for troubleshooting issues.
You can enter your IP subnet on the website and view an overview of your advertisement, connectivity & the 'whois' info from the RIPE DB.
BGP advertisements take some time to filter throughout BGP routers of the internet and therefore won't appear instantly on 'toolkit' websites, however bgp.tools is much quicker than others, such as Hurricane Electric.
Seeing our prefix on BGP.tools means it's propagating through the internet, all via our Route48 tunnel!
I'll do a bigger post on BGP.tools and how you can peer directly with BGP.tools to provide them with your view of the BGP world.
Mikrotik troubleshooting
Some helpful commands:
/routing/stats/origin print: View number of routes received from upstreams./routing/stats/process print: Processes, memory.
The next post in this series explains how to set up RPKI with Mikrotik routers!