Raspberry Pi S3 Backup Server 🔥
It's time to update my Backup Strategy to include a remote backup of my critical and important files! A simple S3 server on a Pi will do the trick!

To date my backup strategy has been fairly simple, a USB hard disk plugged into my NAS.
The NAS runs Open Media Vault and does a fantastic job of serving files to our systems using Samba and NFS.
Samba is used on our local machines to access shares and NFS is utilised by the ESXi host to move backups of virtual machines every day using ghettoVCB.
NFS is also used inside some Linux VMs for file storage - Plex media for example. Media isn't currently backed up, as it's not really important enough to justify the cost of additional backup storage space.
A backup is run by rsync daily to copy my 'Critical' and 'LabFile' directories. These include important personal documents and a backup of lab files - configuration files, VM backups, etc.
This is what I would consider a fairly basic but useful backup strategy for a lab - in the event of a hardware failure in the NAS, I have a backup.
This only goes so far though. I know the risk is small, but what happens if there's a fire in the building while we're away and everything is lost? The USB disk is attached to the NAS, so it would probably be destroyed before the big metal NAS.
A previously used Raspberry Pi 3B in a family members' house is now no longer required - they have a decent internet connection, it's connected by ethernet to the router and the Pi doesn't use much power, so why not use it for something else?
Wouldn't it be good to have a second copy of 'Critical' and 'LabFiles' in a remote location, just in-case?
Upgrade Pi
The Pi I am going to use was running Raspbian Stretch. The location is about 2 hours away from here & we're currently not allowed to leave the county due to COVID - so it's time for some risky remote upgrade fun!
With SSH access, I was able to upgrade from Stetch to Buster very easily using the article below. Just a reminder - if you are going to use SSH exposed directly to the web, be sure to use SSH keys. I will soon dropping SSH access in the firewall as I have the VPN set up - and leave instructions to re-enable it on the firewall with the family in case I end up losing access.

Storage Strategy
I have heard a lot about Duplicati recently - so I thought I'd give it a go. It seems a bit weird to me that V2 was released in a few years back yet it's still Beta; I consider that to be a warning that the data mightn't really be 100% safe - but I'll accept that - I'm planning a backup of a backup in a Lab, not really production stuff!
Duplicati creates AES-256 encrypted blocks that it then uploads to the server. It also provides incremental backups, so you don't re-upload terrabytes every day. Sounds perfect so far.
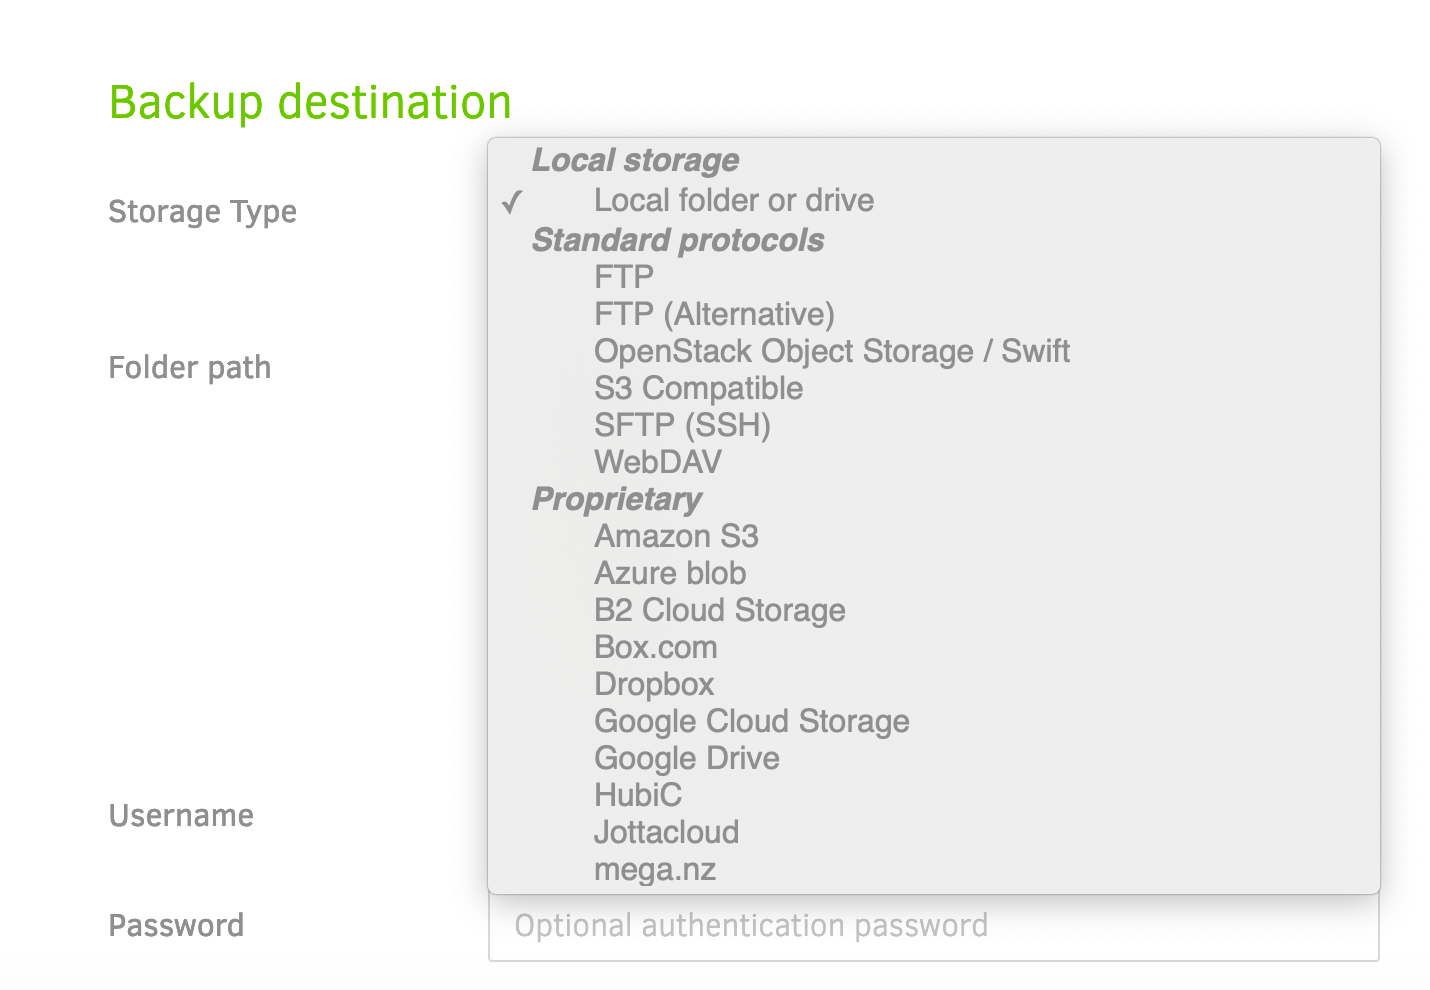
Duplicati has a list of protocols available. I could have run up a simple FTP server or SFTP, both over a VPN, but I thought I would experiment with S3. This is my first time looking at S3 besides reading a bit about it online or YouTube videos. So far, I recommend it.

Duplicati
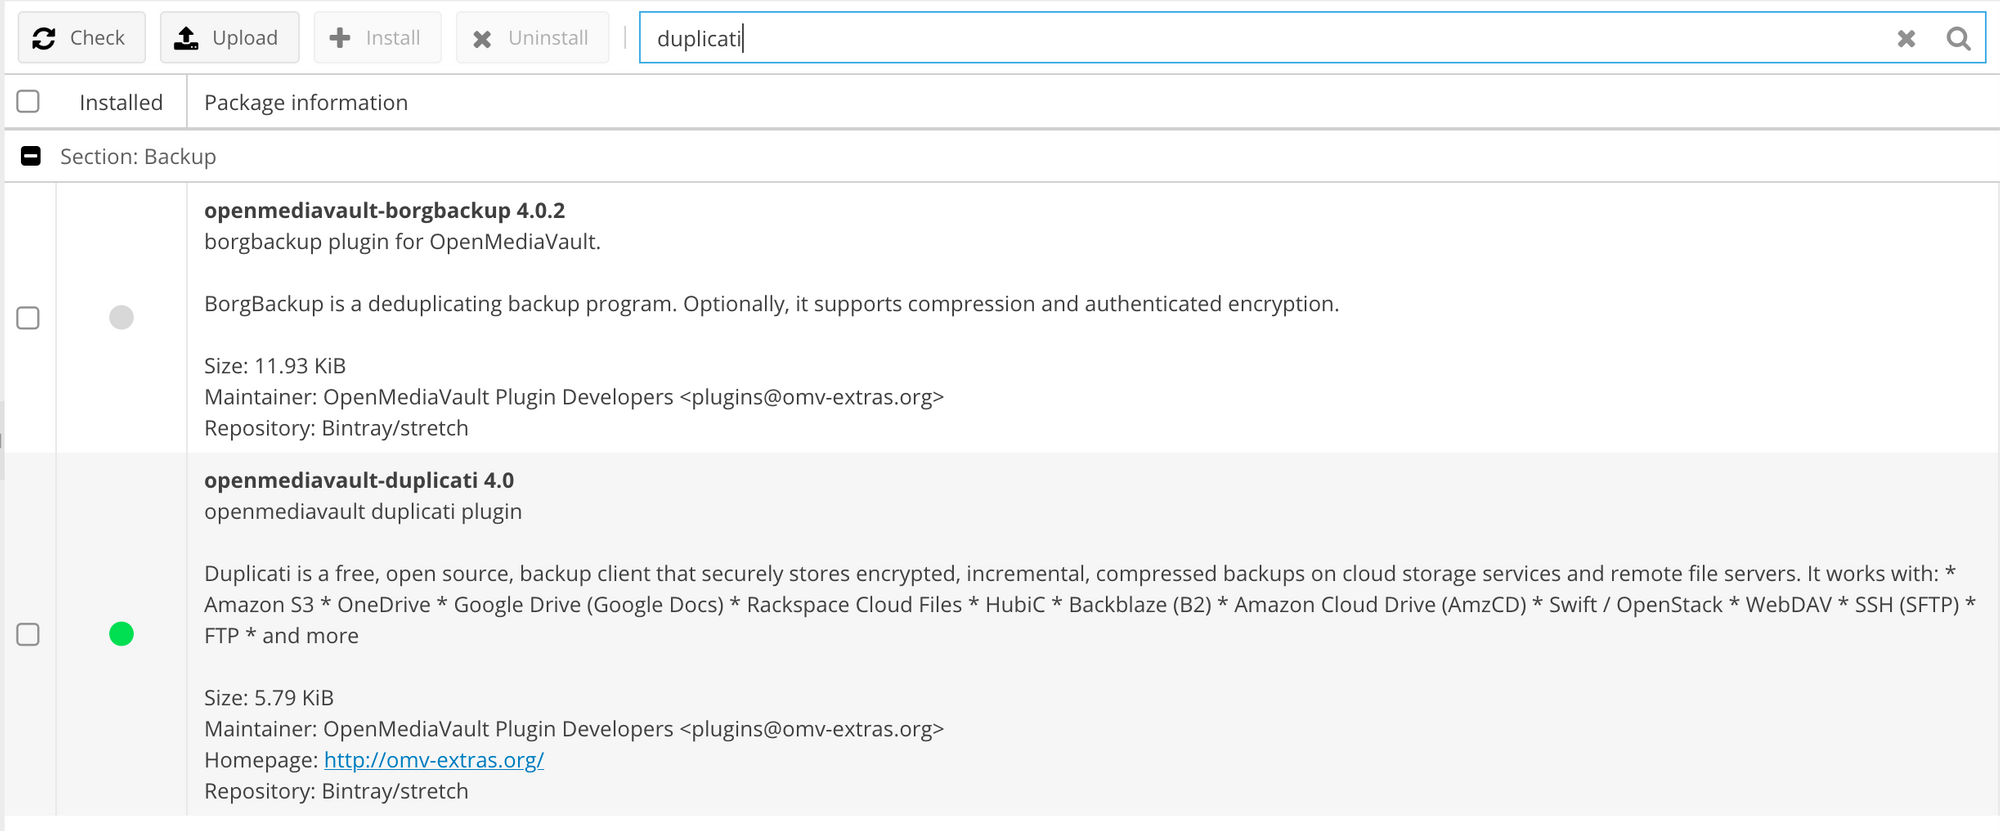
I installed Duplicati using the Open Media Vault package manager. (It lives in the extras package, so make sure you enable that first). Duplicati lives on the local server to be backed up, and will send back-ups to the remote S3 Pi.

Once it's installed and the page has refreshed, you can access Duplicati under the Services tab in OMV.
I changed the listen port to 0.0.0.0 so I could access it across my network.
VPN
I'm not overly keen on directly opening up S3 to the web (or many services to be honest), so I installed Wireguard on the Pi and on the OMV NAS. There are a lot of Wireguard tutorials on the web, so I am not going to repeat the discussion here!
Using a VPN might slow backups a little, but at least there's less risk of the family members network being compromised.
During VPN set-up, you'll want to configure a 'split tunnel' VPN. A split tunnel allows traffic (in this case, the entire subnet), to be sent down the VPN tunnel, while allowing the rest of the traffic to continue as normal.
This means that my NAS connects to all existing services as normal, but when connecting to 10.70.70.0/24, it is allowed to send it down the VPN tunnel. I included the following in [peers] on the NAS wg0.conf file.
AllowedIPs = 10.70.70.0/24Once you have a VPN installed, be sure you can ping the remote Pi from your local machine. In my case, the Pi is on 10.70.70.1.
'Object Storage' on Pi
Before you begin with the S3 installation, you will need to mount your USB file system on the Pi. I have created a folder in /media/BackupUSB/ for mine.
To install Docker on the Pi, this command will do it all for you;
curl -sSL https://get.docker.com | shMinIO have created an S3 object storage system that I'd like to try - and it even has an ARM docker container available!

To run MinIO in Docker on a Pi, here's a run script. Just change the /media/BackupUSB/minio to your storage location;
docker run -v /media/BackupUSB/minio:/objects --name minio -p 9000:9000 -d alexellis2/minio-armhf:latest
If you aren't using ARM for this, here's the run script for the official repository;
docker run -v /media/BackupUSB/minio:/export -p 9000:9000 --name minio -d minio/minio server /exportCheck everything is up and running;
docker psIf MinIO is running, check out the logs to get a hold of the login credentials.
docker logs minioYou can now log into the MinIO web interface, using the IP of the Raspberry Pi with port 9000.
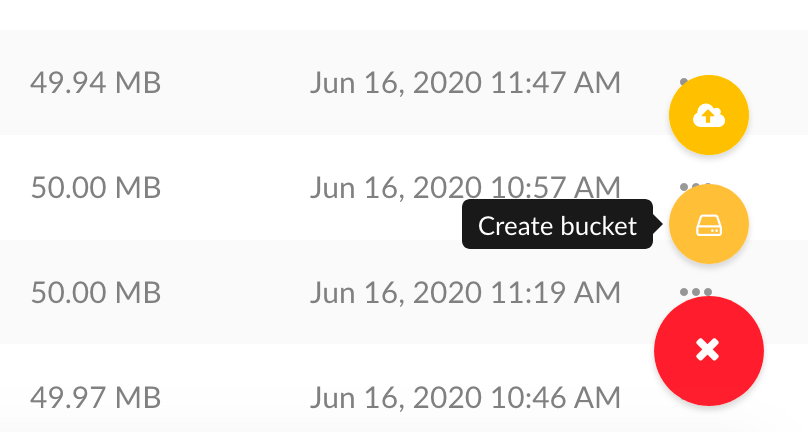
Once logged in, you can create a 'bucket' using the red button on the bottom right hand side of the browser window.

A bucket is basically just a folder - once you create a bucket, check your file system for the new folder!
That seems to be it for setting up an S3 system... pretty easy, right?
Now S3 is ready, we can install Duplicati on different systems, and using the VPN, create remote backups in to different buckets.
Duplicati Backup
Now we are going to set up Duplicati to backup our files to the MinIO bucket.
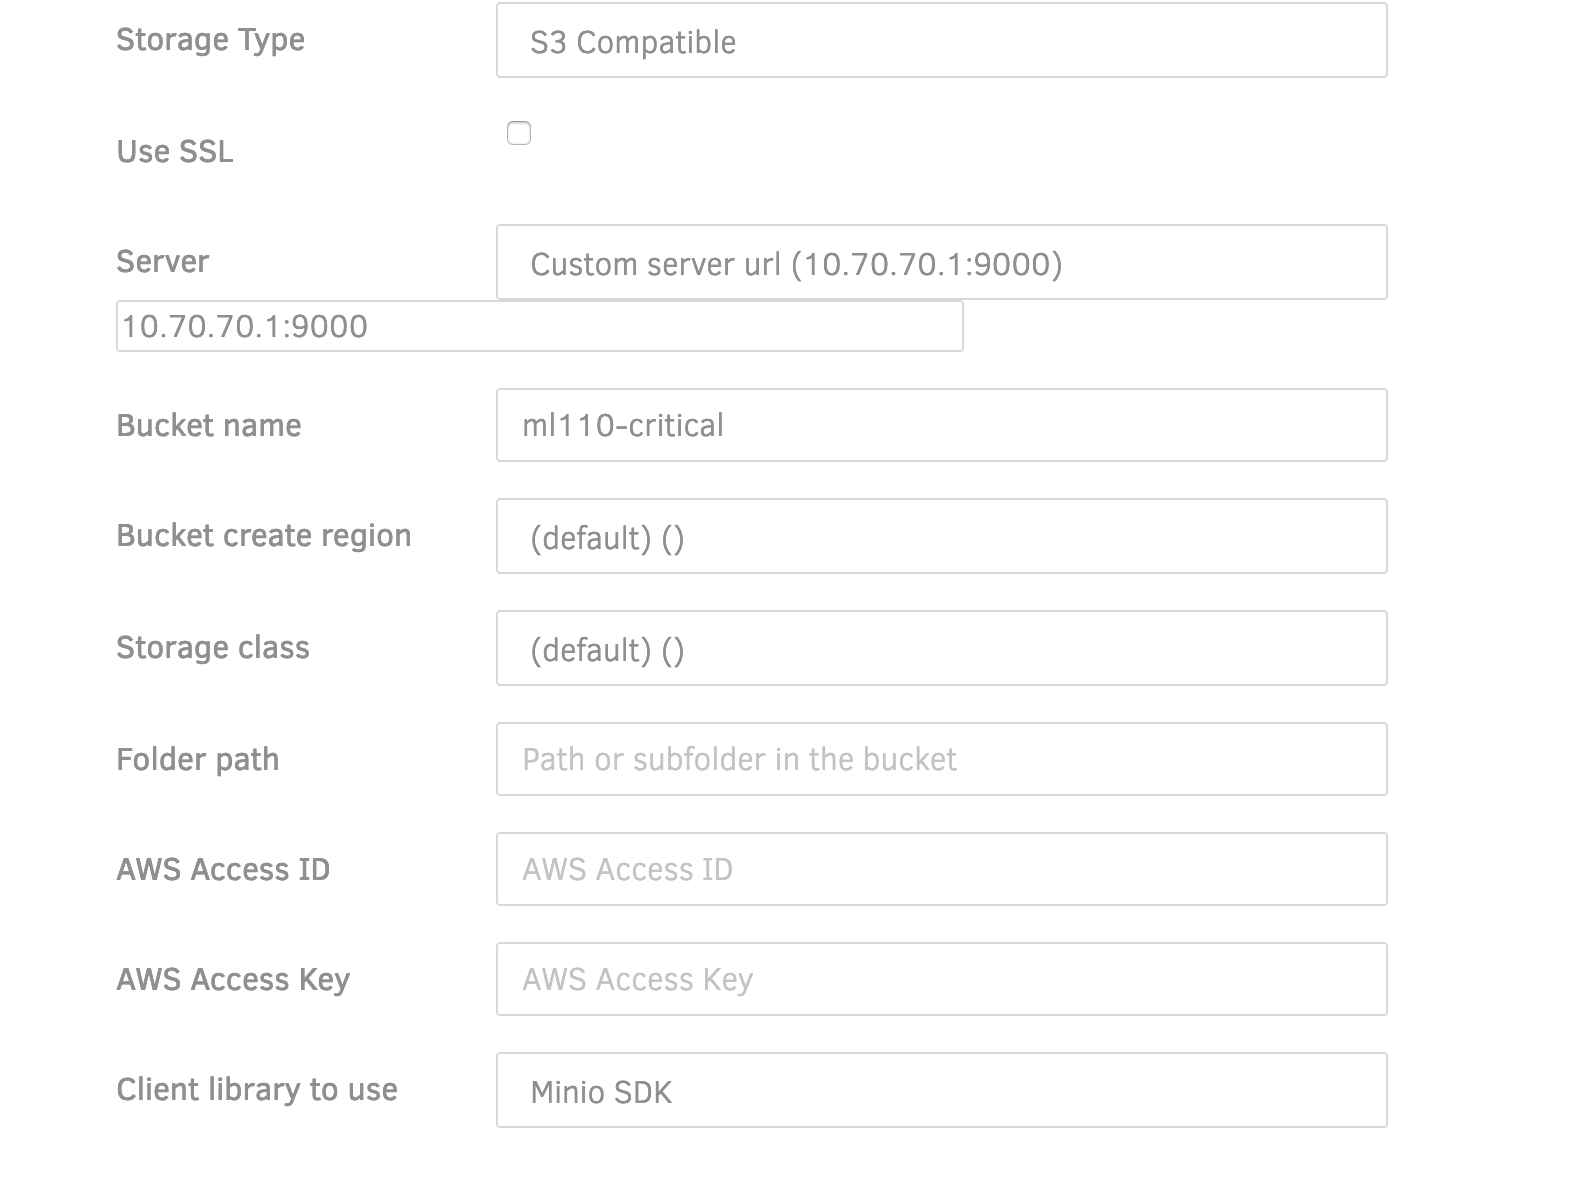
Log in to Duplicati, and add a new backup. You should give your backup a secure passpharase and store it in a safe place! Under 'destination', use 'S3 Compatible'.
Your setting should look similar to below, but change the server address to your Pi MinIO location (remember the port! My setup is 10.70.70.1:9000). If you didn't record your Access ID & Key earlier, they can be found in the minio logs - check above.

The bucket name should be the one you created earlier. You will receive prompts telling you 'The bucket name should start with your username, prepend automatically?'. I chose 'no' for this - maybe not best practice, but it works for me. The client library should also be Minio SDK.
Next, you'll want to choose what you want to back up, and when you want Duplicati to do it.
Under 'options', the final stage, you'll be asked about volume size and retention. I kept the standard 50mb - it's a reasonable size for sending files to a Pi and over a shared internet connection. I also chose 'smart backup retention':
Over time backups will be deleted automatically. There will remain one backup for each of the last 7 days, each of the last 4 weeks, each of the last 12 months. There will always be at least one remaining backup.
Now, you can save, and hit 'backup now'! Give it a few minutes and check MinIO web browser (or the file system on the Pi) and see if files are transferring!
A little advice...
I suggest starting with a small folder containing a few files, then gradually increase what you are storing on the remote server - this will give you a feel of how everything works and if you break something during 'tinkering', it isn't the end of the world!
I won't tell you why I think this is good advice, but you might infer how many hours were wasted by the fact I mentioned it...
Get in touch with thoughts or comments! hi@xga.ie


