FreePBX at Home - Part 3
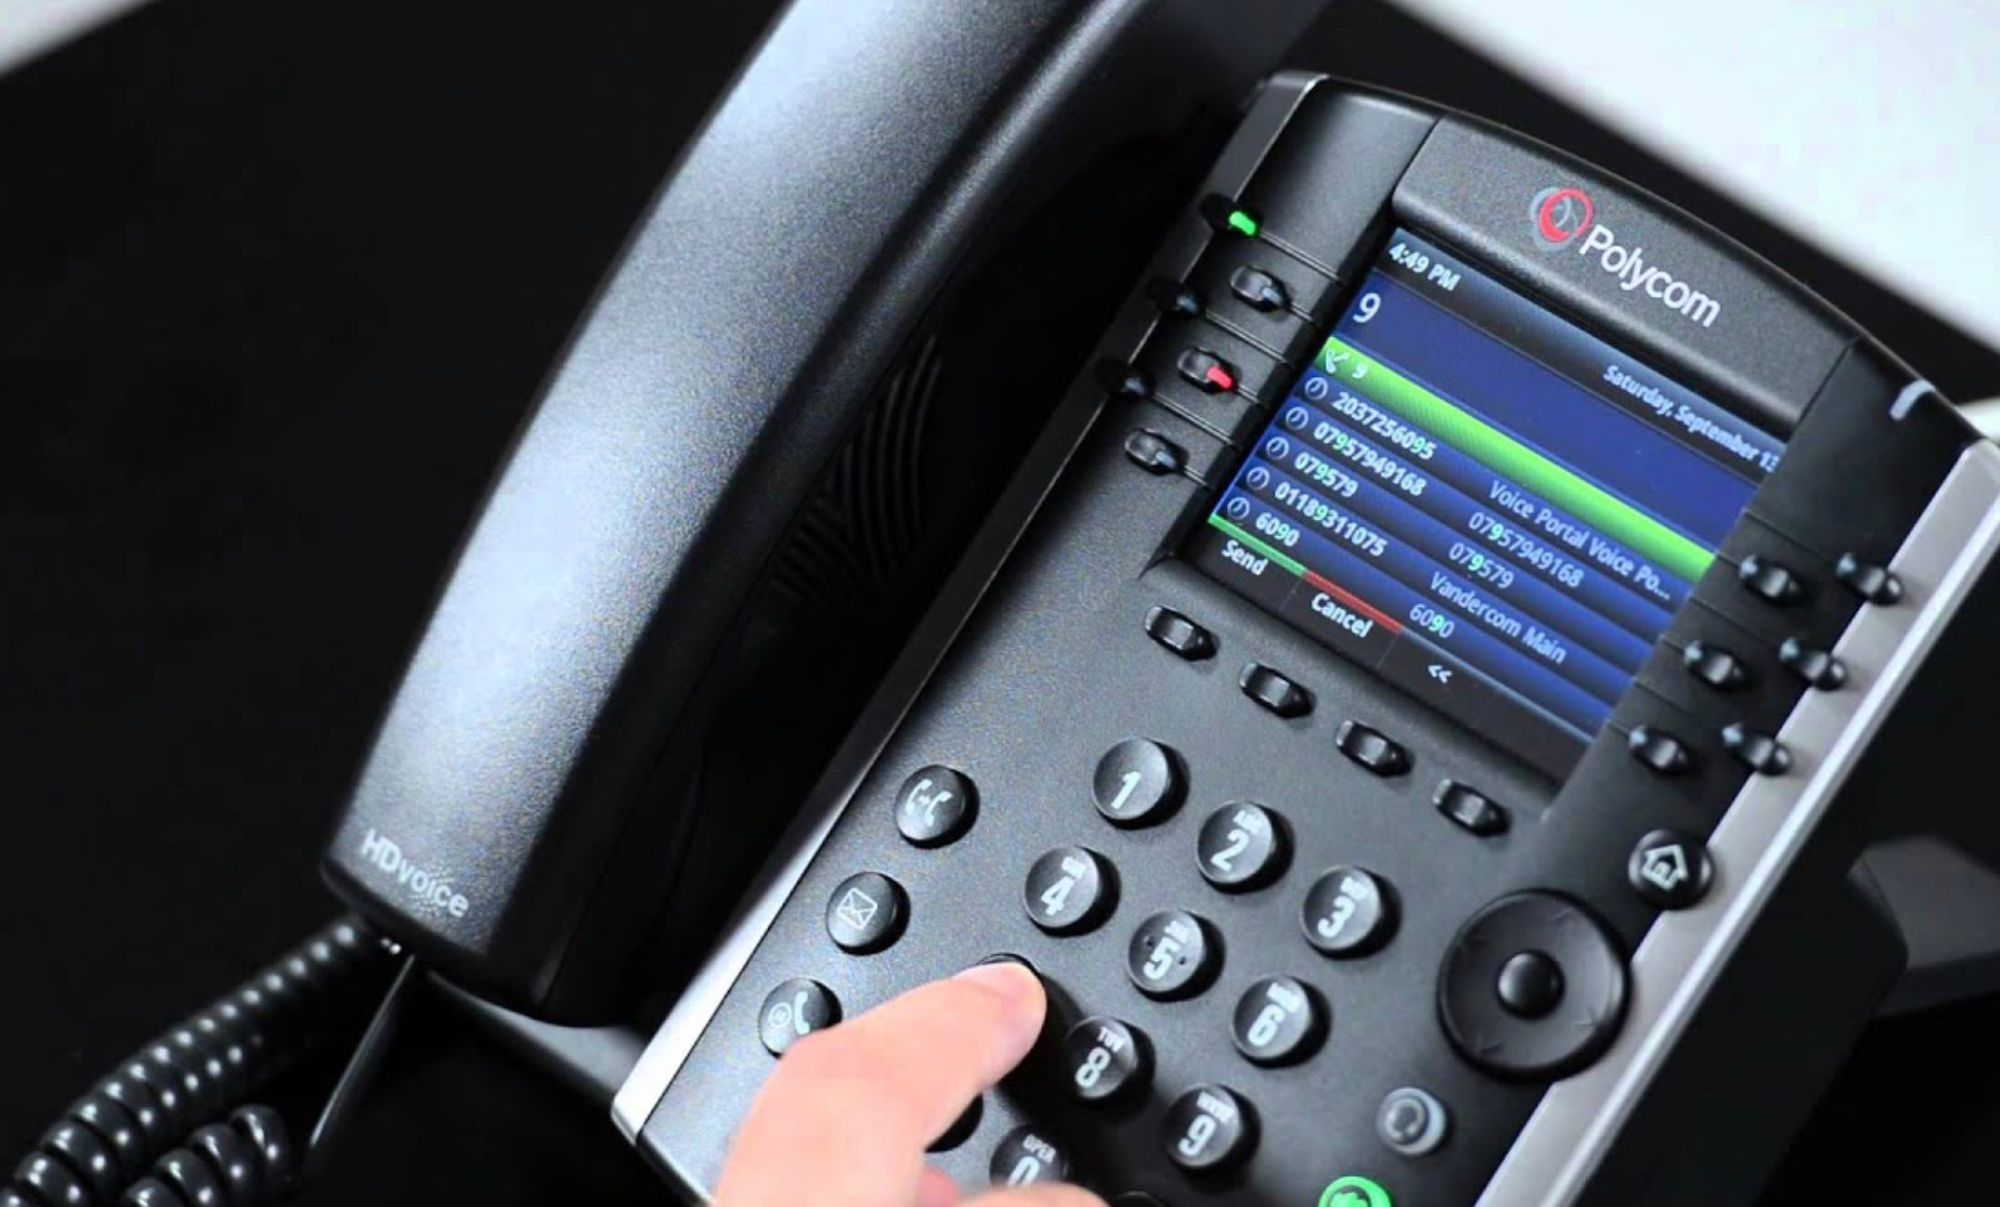
Welcome to part 3 of 4 in the Home PBX series! We will look at setting up our Polycom VVX410 phone with a provisioning server.

This is penultimate guide in the FreePBX series, check out the other guides here!
I picked up a used VVX410 phone on a local deals website. I heard they play well with SIP, can be provisioned remotely and have great call quality. It also uses Power Over Ethernet, so no need for another power adaptor!
From my limited experience, I can agree with those statements and have found plenty of material online for getting everything working.
Provisioning vs. local config
You might be wondering why I chose to provision the phones with configuration files and not just set it up from the web browser. By providing provisioning files, it's easier to set up multiple phones - or a whole network of them. Plus, if I change the hardware or want to add new phones, all I have to do is change or add a filename - which is the MAC address of the handset.
Provisioning methods
TFTP vs HTTP
The 'normal' way of providing provisioning files to a networked phone is via TFTP, or Trivial File Transfer Protocol. FreePBX features a built in TFTP server, which can serve the files to the phone.
To assist with a speedy configuration, most commercial routers allow you to set the TFTP server as an option in the DHCP configuration. This means when the phone is assigned an IP address, it's told where it can look for the provisioning files.

I opted for a slightly more unusual method for my lab phone - as it doesn't need to be used in production.
I added a (local) DNS record for prov.xga.ie, and added it as a virtual host in Caddy. I serve a number of local sites using Caddy, which is a really lightweight and easy to configure web server. I really recommend trying it.
I went with this route because I have a Samba share set up, which means I can change configuration files quickly and they are immediately available to the handset.
If you decide to try Caddy and need a simple configuration for serving static files, you can try this as a base;
# PBX Polycom Provisioning server
prov.xga.ie:80 {
  gzip
  root /var/www/prov.xga.ie
}Initialising the phone
This part is only required if you don't use the TFTP provisioning option.
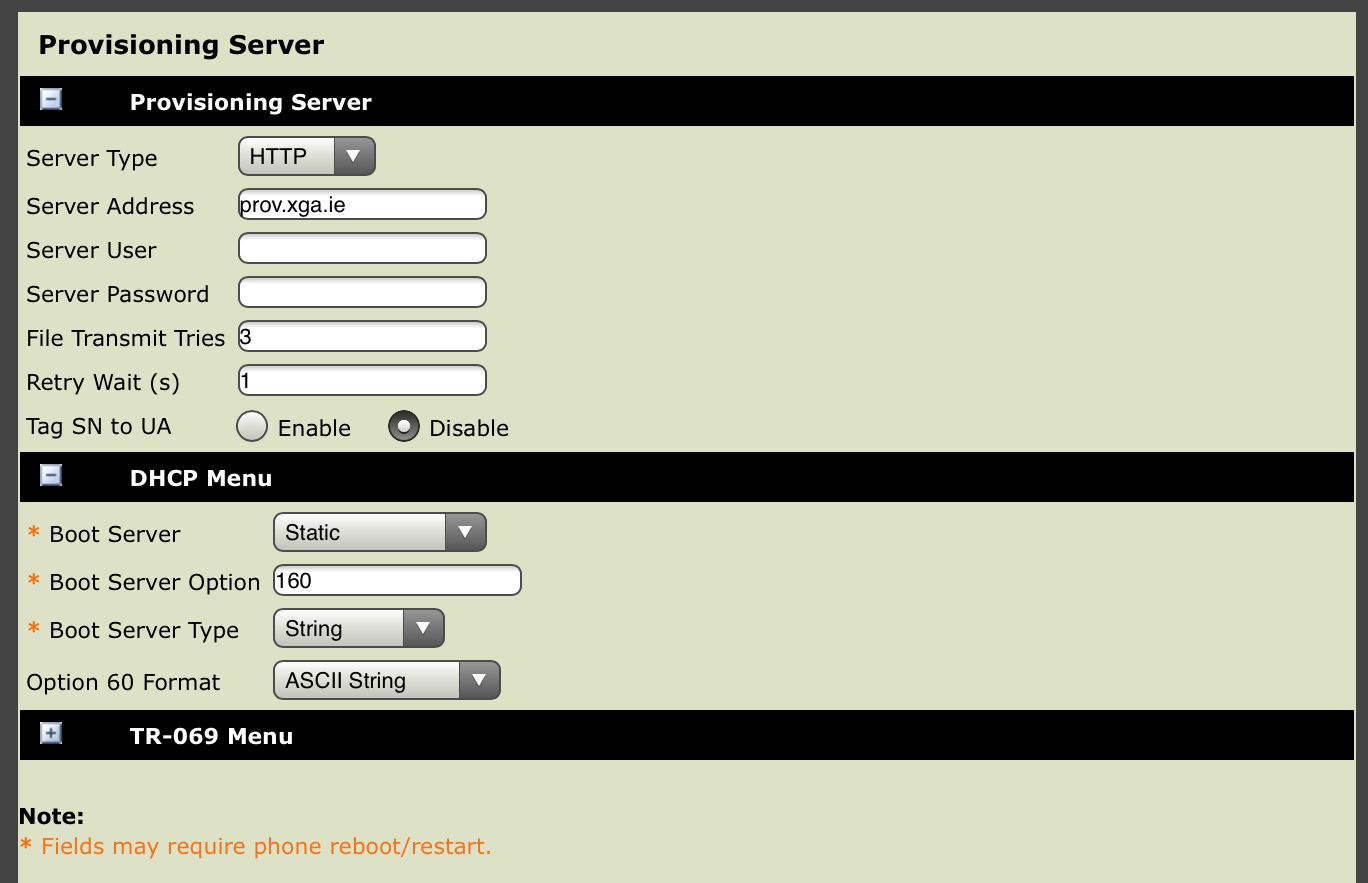
Plug in your handset and let it power up. Log in to the web config (using HTTPS), then click Settings > Provisioning Server.
Change the type to HTTP & set the server address. You can remove the username and password. In DHCP Menu, change the Boot Server to 'Static'.
The asterisk beside the Boot Server line indicates the phone will reboot when the form is submitted. When it next boots up, it will go in search of it's provisioning data!
Provisioning Files
The set up of provisioning files is made very easy thanks to a GitHub repository from GreigInSydney.
Using these files as a base, we will be able put together a semi-advanced provisioning server in no time at all!
Clone this repository into the root of your provisioning server;
git clone https://github.com/greiginsydney/000000000000.cfg.gitInside the folder 'FIRMWARE-VVX', download and unzip the latest firmware from here. Two things to note: use the split firmware, and note that for the VVX410 (which is what I am using), the highest compatible FW is <V6.
Greig, the Repo author, recommends putting the firmware in a sub-folder like 'FIRMWARE-VVX/5.9.6-rts38-May19', which is a very good idea.
Now, you can review the file 000000000000.cfg (also known as zeros.cfg) - you want to edit the file to include APP_FILE_PATH to include the firmware folder you created earlier:
<Software APP_FILE_PATH="FIRMWARE-VVX/5.9.6-rts38-May19/sip.ld" />Also, if you change the 'CONFIG_FILES', you'll need to point those to the right place too. I actually duplicated the customisation.cfg and AU-DST.cfg and created xga-customisations.cfg and IE-DST.cfg. This was so I could use the other file as a base for my system and have something unedited I could refer back to.
You may also want to personalise all handsets individually, in that case you can rename the file from zeros to the MAC address of the phone, like 0004f324a857.cfg. When the phone looks for a configuration file, it will first search for its own MAC address, then the zeros.conf file.
You may also have a default zeros.conf file and add an 'overrides' file, which we will look at later on. This will allow a 'standard' configuration + phone specific overrides.
The Daylight Savings config did cause me some hassle - I ended up factory resetting the device and it has worked fine since...go figure. Here's a working copy for UK & Ireland;
<?xml version="1.0" encoding="utf-8"?>
<polycomConfig xmlns:xsi="http://www.w3.org/2001/XMLSchema-instance" xsi:noNamespaceSchemaLocation="Config/polycomConfig.xsd">
<dst>
  <!-- Don't forget to set the correct CityID! https://greiginsydney.com/polycom-vvx-trio-time-zone-location-description/ -->
  <tcpIpApp>
    <tcpIpApp.sntp>
    <tcpIpApp.sntp.address tcpIpApp.sntp.address.overrideDHCP="0"></tcpIpApp.sntp.address>
    <tcpIpApp.sntp.daylightSavings tcpIpApp.sntp.daylightSavings.enable="1" tcpIpApp.sntp.daylightSavings.fixedDayEnable="0">
    <tcpIpApp.sntp.daylightSavings.start tcpIpApp.sntp.daylightSavings.start.dayOfWeek="1" tcpIpApp.sntp.daylightSavings.start.month="3" tcpIpApp.sntp.daylightSavings.start.time="1">
    <tcpIpApp.sntp.daylightSavings.start.dayOfWeek tcpIpApp.sntp.daylightSavings.start.dayOfWeek.lastInMonth="1"></tcpIpApp.sntp.daylightSavings.start.dayOfWeek>
    </tcpIpApp.sntp.daylightSavings.start>
    <tcpIpApp.sntp.daylightSavings.stop tcpIpApp.sntp.daylightSavings.stop.dayOfWeek="1" tcpIpApp.sntp.daylightSavings.stop.month="10" tcpIpApp.sntp.daylightSavings.stop.time="2">
    <tcpIpApp.sntp.daylightSavings.stop.dayOfWeek tcpIpApp.sntp.daylightSavings.stop.dayOfWeek.lastInMonth="1"></tcpIpApp.sntp.daylightSavings.stop.dayOfWeek>
    </tcpIpApp.sntp.daylightSavings.stop>
    </tcpIpApp.sntp.daylightSavings>
    <tcpIpApp.sntp.gmtOffset tcpIpApp.sntp.gmtOffset.overrideDHCP="0" tcpIpApp.sntp.gmtOffset="0" tcpIpApp.sntp.resyncPeriod="3600"></tcpIpApp.sntp.gmtOffset>
    </tcpIpApp.sntp>
  </tcpIpApp>
</dst>
</polycomConfig>Main Configuration
By provisioning a large number of phones, you can keep everything uniform. For example, the local admin PIN, or making all the phones go to power saving at the same time.
The main configuration from Greig is immensely detailed - it's really great. You can get most of the information you need from the notes in the file.
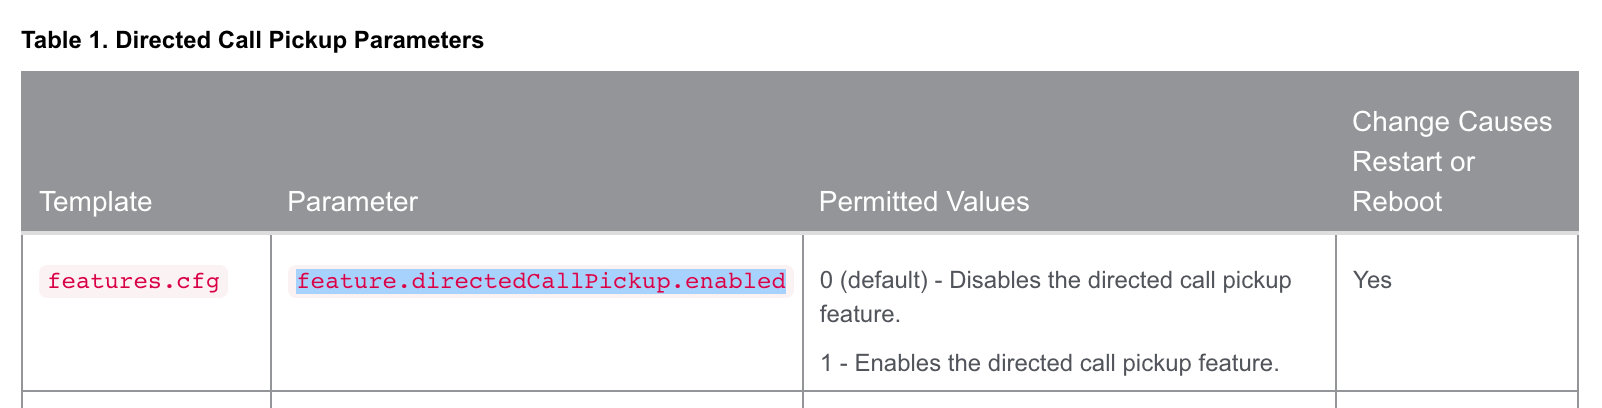
If you need more information, visit the link below and search for the parameter that you want to research - for example, just put 'feature.directedCallPickup.enabled' in the search box and within a few clicks, you'll find the parameter and any permitted values.
You can find 'pre-made' configuration files as part of the firmware file you downloaded to put in the FIRMWARE-VVX folder - have a look in the 'Config' folder.
For reference, according to my switch, the VVX410 idles about 2W with in-use power around 3-4W (that is, with the screen on / on a call).
Overrides
It's possible you might want to over-ride the master configuration file for a specific phone. This can be completed with an override file.
The phone will look for macaddr-phone.cfg in the OVERRIDES folder, like OVERRIDES/0004f324a857-phone.cfg
I use the override file to configure the SIP settings for the phone. This allows me to have a base configuration ready and customise only the necessary 'per-phone' settings. The file contains the following:
<device device.set="1">
<device device.auth.localAdminPassword="369" device.auth.localAdminPassword.set="1" />I changed the local Admin password on the phone to "369"
<reg reg.1.lineKeys="3" reg.1.line.1.label="XGA Line 1" reg.1.line.2.label="XGA Line 2" reg.1.line.3.label="XGA Line 3" reg.1.address="301" reg.1.auth.domain="192.168.1.49" reg.1.auth.userId="301" reg.1.auth.password="topSecretSecretFromFreePBX" reg.1.outboundProxy.address="192.168.1.49" reg.1.outboundProxy.port="5060" reg.1.server.1.address="192.168.1.49" reg.1.server.1.port="5060" reg.1.srtp.enable="1" reg.1.srtp.offer="0" reg.1.srtp.require="0"/>
SIP & Line config. I have three 'lines' available for my extension. This makes things a little easier when accepting multiple inbound calls and holding conference calls. Note above I have disabled SRTP offer / require on the VVX - with it enabled, calls would not connect to FreePBX, it simply just beeped. Default settings have these enabled.
<up up.cfgUniqueLineLabel="1" />
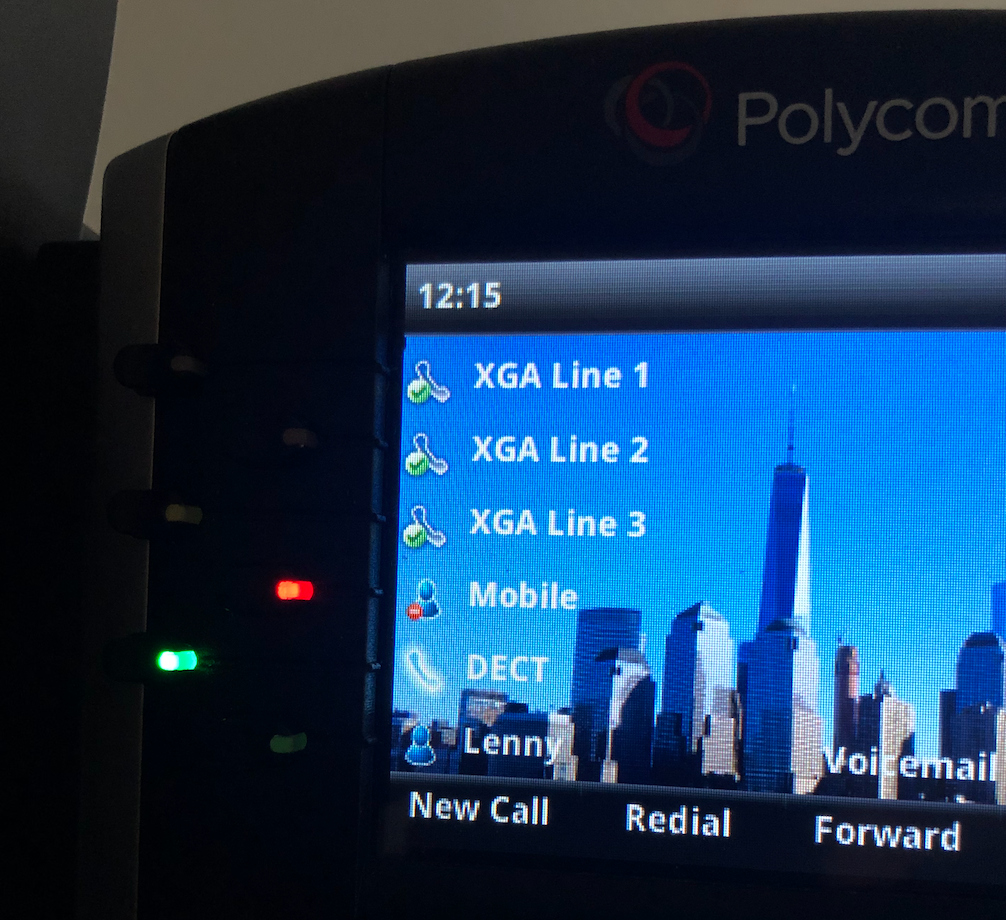
Config option to allow unique line labels (see the screenshot below - XGA Line 1, Line 2, etc)
<voIpProt>
      <voIpProt.server voIpProt.server.1.address="192.168.1.49" voIpProt.server.1.port="5060" />
      <voIpProt.SIP.outboundProxy voIpProt.SIP.outboundProxy.address="192.168.1.49" voIpProt.SIP.outboundProxy.port="5060" voIpProt.SIP.outboundProxy.transport="DNSnaptr" />
</voIpProt>Finally, the protocol settings for the device.
A number of these settings could be in the global zeros file, but for testing I include them in the override file instead.
Contacts
Adding contacts is really simple using using the provisioning server - though it may not be the best way, as every time the phone re-provisions, it will just move a copy from the contacts file to the phone, removing any personalised contacts added to the handset. I find it easier to add contacts using the XML file & reloading the configuration rather than doing it on the handset!
Here's an example of the contacts file;
<?xml version="1.0" encoding="UTF-8" standalone="yes"?>
<!--ln (last name), fn (first name), ct (contact tel), sd (speed dial index), lb (label), pt (protocol - not used)-->
<!--rt (ring tone), dc (divert contact), ad (auto direct), ar (auto reject), bw (buddy watching), bb (buddy block)-->

<directory>
	<item_list>
		<item>
			<ln>Bosses</ln>
			<fn>Mobile</fn>
			<ct>90123456789</ct>
			<lb>Boss Mob</lb>
			<sd>1</sd>
			<bw>0</bw>
			<bb>0</bb>
		</item>
	</item_list>
</directory>
This file should be saved in a similar format to the other files, CONTACTS/0004f324a857-directory.xml
I have added comments to the top of the file that explains each of the fields - more detail can be found on the provisioning docs here. This entry is the number 1 speed dial. This means the phone will place it on the home screen, after Lines & BLF (as we'll cover next).
BLF (Busy Lamp Field)
We can use BLF to indicate if a line is in use or not. This might be really helpful for a receptionist in a busy office for routing calls, or remote office workers. I use this feature to see if the handheld DECT phone or Zulu mobile app are on calls.
<attendant attendant.uri="" attendant.reg="" attendant.ringType="1" attendant.behaviors.display.spontaneousCallAppearances.normal="0" attendant.behaviors.display.spontaneousCallAppearances.automata="0" attendant.behaviors.display.remoteCallerID.normal="1" attendant.behaviors.display.remoteCallerID.automata="1" attendant.resourceList.1.address="302@pbx.xga.ie" attendant.resourceList.1.label="Mobile" attendant.resourceList.1.type="normal" attendant.resourceList.2.address="303@pbx.xga.ie" attendant.resourceList.2.label="DECT" attendant.resourceList.2.type="normal" attendant.resourceList.3.address="399@pbx.xga.ie" attendant.resourceList.3.label="Lenny" attendant.resourceList.3.type="normal" />
This configuration is added in the OVERRIDES file for the phone, as it's unique to that handset.
You can see it includes the Mobile, Handheld (DECT) & Lenny extensions. As Lenny (the pre-recorded telemarketer trap) is a virtual extension, it doesn't work as BLF but I keep it there anyway!
Using BLF I can see extensions in use (red) & ringing (flashing green)
Background Images


Here are some background images I have tried on the VVX. I took this picture of Manhattan a few years back and it works nicely as the VVX background, though the resolution has gone to pot with all the resizing! The Red Arrows image was taken by my partner but isn't as good as a background due to the amount of white (which drains out the white text on the screen). It may suit you better if you don't have as many line keys being used as I do. Changing the line key text to black would fix this, but I haven't managed to find a way to change it... yet.
To use a background image, just upload it to the root of the provisioning server and add this config line (changing the 'name' to the file path);
<bg bg.color.VVX400.selection="2,1" bg.color.VVX401.selection="2,1" bg.color.VVX410.selection="2,1" bg.color.VVX411.selection="2,1" bg.color.bm.1.name="nyc.jpg" />
Results
The VVX phone is now configured by local HTTP configuration files - now my testing is complete, I may move them to TFTP and allow the config to be completely autonomous.
I have three lines available on my extension, BLF set up to see when other extensions are ringing or busy, a shortcut to call Lenny if I get tortured by telemarketers, and a list of speed dials which are imported from the Contacts file.
The call quality I have experienced on outbound SIP trunks has been fantastic. The phone uses very little power and is perfect for a home PBX or SME, even second hand.
Thanks for reading & check back soon for the final post in the PBX Series, which covers mobile access to the PBX using Zulu, the built-in integration for softphone users.