FreePBX at Home - Part 1
A home PBX project; part 1 of 4 looks into setting up FreePBX and creating extensions, inbound & outbound routes via an online call provider.


This is part 1 of 4 in the FreePBX series to give details on how I set up a small PBX at home.
This post will detail the setup of FreePBX in a virtual machine, configuration of a SIP trunk plus inbound and outbound routes. The next posts will focus on the HT503 FXO / FXS gateway, deploying Polycom VVX phones & finally, setting up Zulu on mobile devices for access to the PBX while we are out of WiFi range.
A PBX, or Private Branch Exchange, is a system that allows us to manage incoming / outgoing calls, as well as internal communications. I previously managed PBX systems in production and have no real need for one at home, but it is a project to kill some time in COVID-19 lock-down and try to remember things that have slipped my memory!
The system will also will help me save money on calls. My mobile provider charges €0.38/min to call local landlines & mobiles, but using my PBX I can automatically use my free evening/weekend calls or an online calling service which is much cheaper (like the 9 minute international test call I made to a foreign mobile for only $0.19).
In future I plan to look into providing point-to-point calls using the PBX and a VPN, creating an easy way to communicate with friends and family for free, without the need for third party mobile phone apps like WhatsApp or FaceTime.
FreePBX
I utilised FreePBX for my project as it's based on the open source Asterisk software. FreePBX isn't completely 'free', despite it being in the name; both FreePBX and Asterisk are 'sponsored and maintained by Sangoma', so you can expect to see plenty of logos, some commercial software upgrades and plenty of options to buy their hardware! The core functionality to get a PBX running is free, and you can find commercial modules, support packages and other things that Sangoma offer here.
FreePBX does have an active community, so if you get stuck, you can always ask for some support.
There are other PBX systems available out there, some with free licences like 3CX.
FreePBX Virtual Machine
To get started, prepare a virtual or physical machine to run FreePBX.
The hardware requirements aren't listed, but Sangoma do publish hardware that's built into their appliances as a guide. I run my test VM with 2 cores, 2GB and 20GB storage - it runs fine for my testing & can be expanded if necessary.
Once everything is ready to go, download the FreePBX software from their site. You can put the ISO on a CD or USB, then boot it up.
Installation is straightforward, with prompts along the way. You will be prompted to choose which Asterisk version you wish to install. I went with the recommended versions that were pre-selected.
A root password will be requested during the installation - keep this safe!
Once the system has finished installing and has rebooted, go to your browser and enter the IP address of your FreePBX server. If you don't know the IP address, you can log into the interface of the server, and the IP address will be shown.
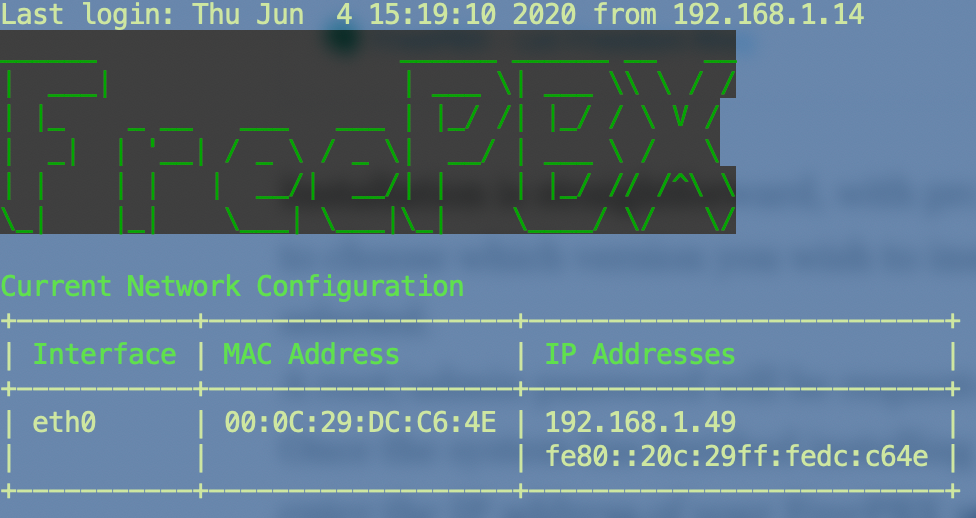
Once you have logged in to the web interface, you will be greeted with the intial setup wizard.
The setup wizard will prompt you to activate your FreePBX system with Sangoma. This doesn't have to be completed, however it will be required for part 4 of the series if you wish to use Zulu for making and receiving calls on your mobile phone while out of range of your network.
Next up, you will be prompted to set up the Smart Firewall. I recommend you use the firewall built in to FreePBX as a way of securing the installation. The firewall wizard is intuitive and will allow you to 'trust' the device & network you are connected from - this means you can connect from that IP address to fix a dodgy configuration and reduces the chances of issues when provisioning phones. In addition, the 'responsive firewall' can be enabled. I recommend switching on the responsive firewall & I strongly recommend against opening your PBX ports to the web.
If you search the web, you'll find there are many horror stories of thousand-dollar bills being run up after an unsecured PBX has been hacked.
Now that the wizard is complete, you'll be directed to your dashboard... Your PBX is now up and running!
Setting up your first extension
Now we are going to set up our first extension.
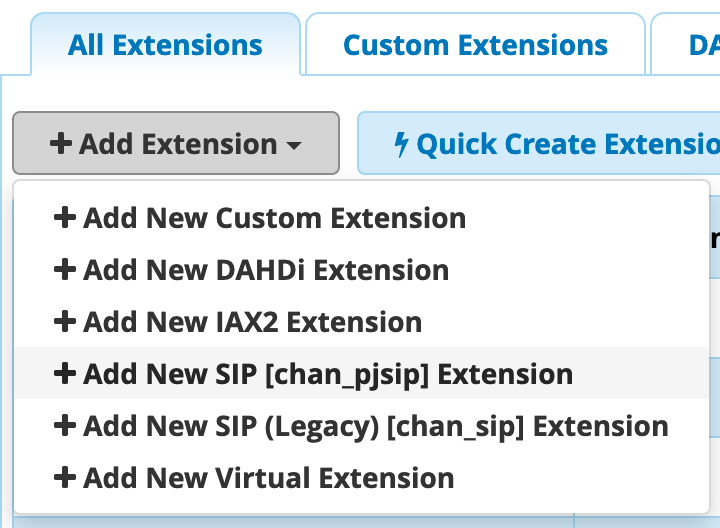
At the top of your FreePBX portal, click 'Applications' then 'Extensions'.
This extension is going to be used on our Polycom VVX phone, so we'll set it up as a 'chan_pjsip' extension.
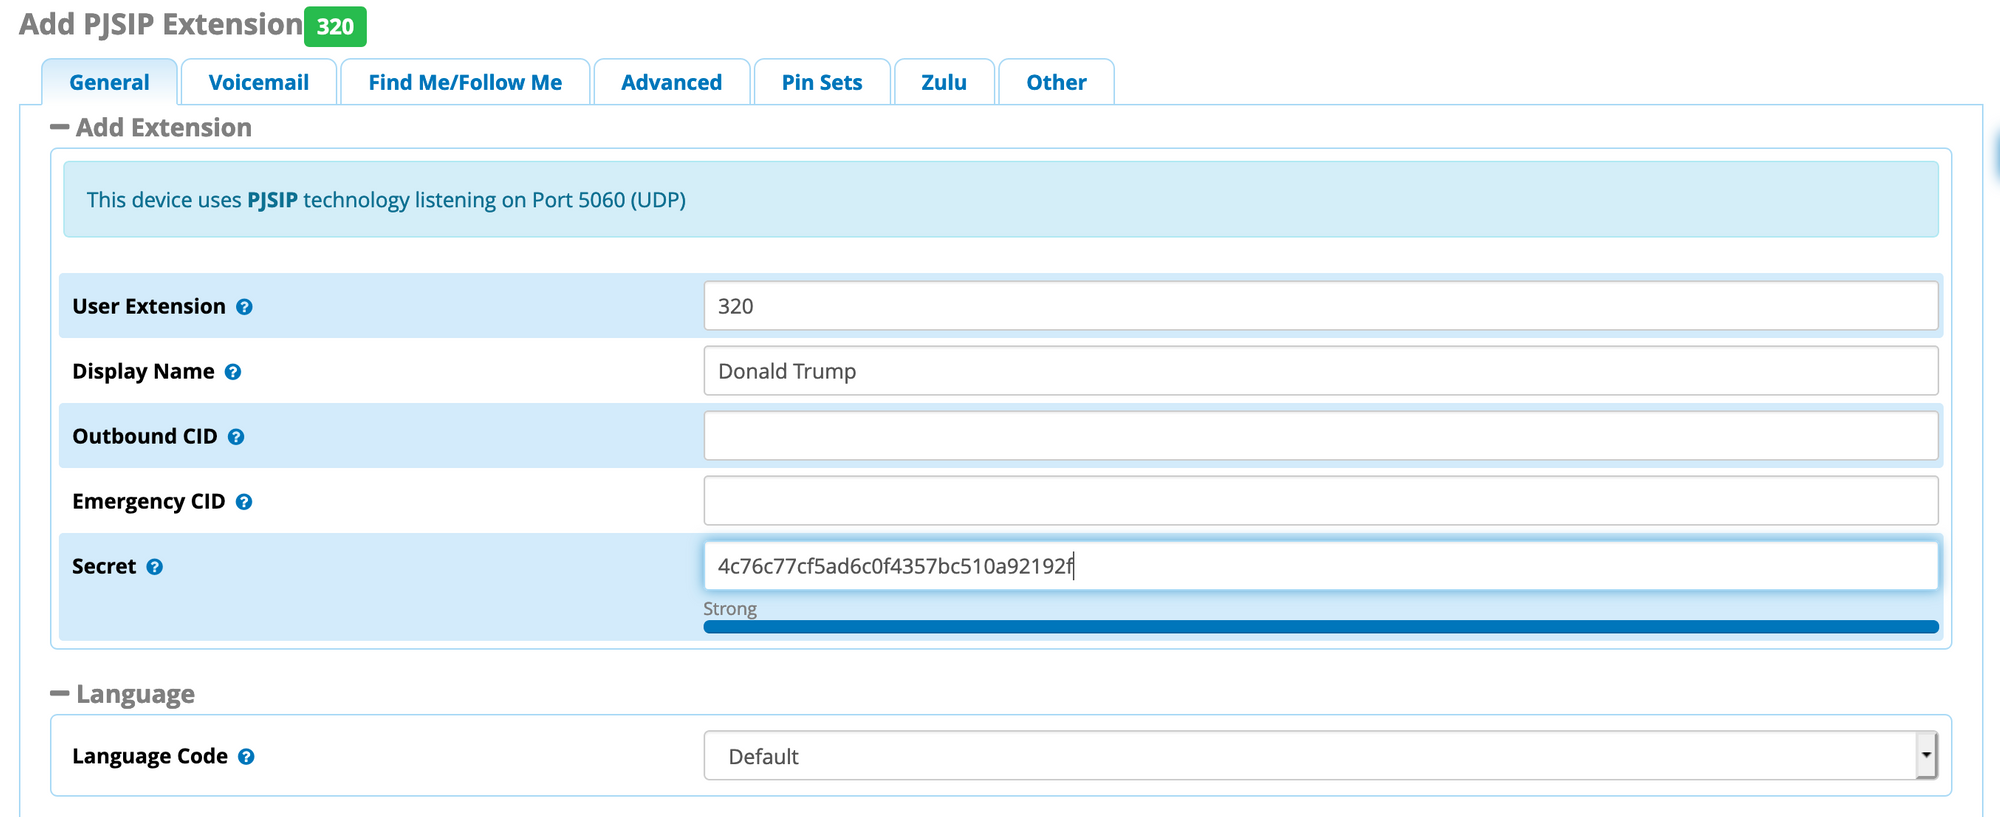
Now, we can enter the extension number we want to use, plus a display name for our extension.
Hovering over 'Secret' will display the passcode we will use to authenticate for user '320'. Always ensure the secret is displayed as strong - see note above regarding hacking! If we return to the extension page we can obtain the secret again - so there's no need to write it down or save it elsewhere.
You can set up a username and password on the lower part of that form if you wish to use the User Control Panel (UCP) for any users on your PBX. If you are planning on following this guide to set up the Zulu softphone, you should add a user at this stage.
Voicemail settings, Follow Me, Advanced, Pin Sets, Zulu & Other can be customised from the tabs.

I utilise a group voicemail box, so voicemail is disabled for all extensions - you should change the settings and operate the voicemail commands when you are comfortable with your PBX.
Find Me / Follow Me can be used to ring out to a mobile (as one of may examples) should the extension not be answered within a set number of rings. If you dial out to a mobile number using your SIP trunk as part of the Find Me / Follow Me feature, remember you will likely be charged.
That's our extension complete!
Adding a SIP Trunk
A SIP trunk can be used make calls over the internet. I used Twilio as I could get a UK number to test (plus a bit of free test credit). You can verify mobile numbers for most worldwide countries and this will allow you to run tests for incoming and outgoing calls. Once you have upgraded from a test account, you can verify by call, meaning you can set your existing landline number as the outgoing caller ID on a SIP line.
If you do decide to use Twilio as a trunk, please consider using my referral link. If you create and upgrade your account (if you top it up), we both receive $10 bonus credit. Thanks!
There are of course other SIP providers out there. If you're in the UK, sipgate provide a free developer account (but it does use the '056 number' and some providers charge a lot to connect to these numbers). I didn't do a huge amount of testing with sipgate, but I think they will allow Emergency Calling after address verification.
If you are in the USA, SignalWire are 'priced to disrupt', with really low call rates and a local USA number for around 8¢ per month. At the time of writing, you get $25 free with a $5 top up - if you use that credit just for the US phone number, that's about 31 years at 8¢/mo! That reminds me, I should check if the credit expires...
I set my trunk to use pjsip, I recommend you use this route now as pjsip uses port 5060 (more info on this at the bottom of the post). In the pjsip settings tab:
- Username & secret: As set up in the Twilio SIP > Authentication > Credentials list
- Authentication: Outbound
- Registration: None
- SIP Server: As Twilio SIP > Networking Info (normally projectname.pstn.country.twilio.com)
- SIP Port: 5060
- Context: from-pstn
- Transport: 0.0.0.0-udp
For the remainder of the trunk configuration, see the following guide from Twilio;
 Annie Benitez Pelaez
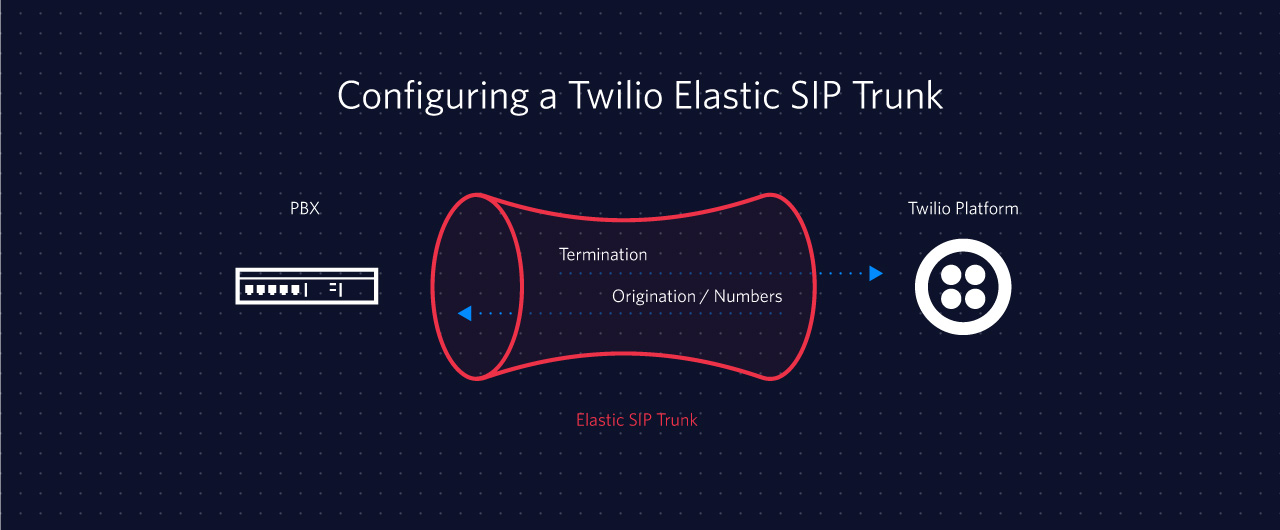
Note that no dialled number manipulation is required in the Trunk setup.
Submit & Apply Config!
Creating an outbound route
Once you have an trunk added, you can add an outbound route. This creates the rules in the PBX that allow a call to be routed from a phone or softphone out to the SIP trunk.
Add an outbound route like the following;
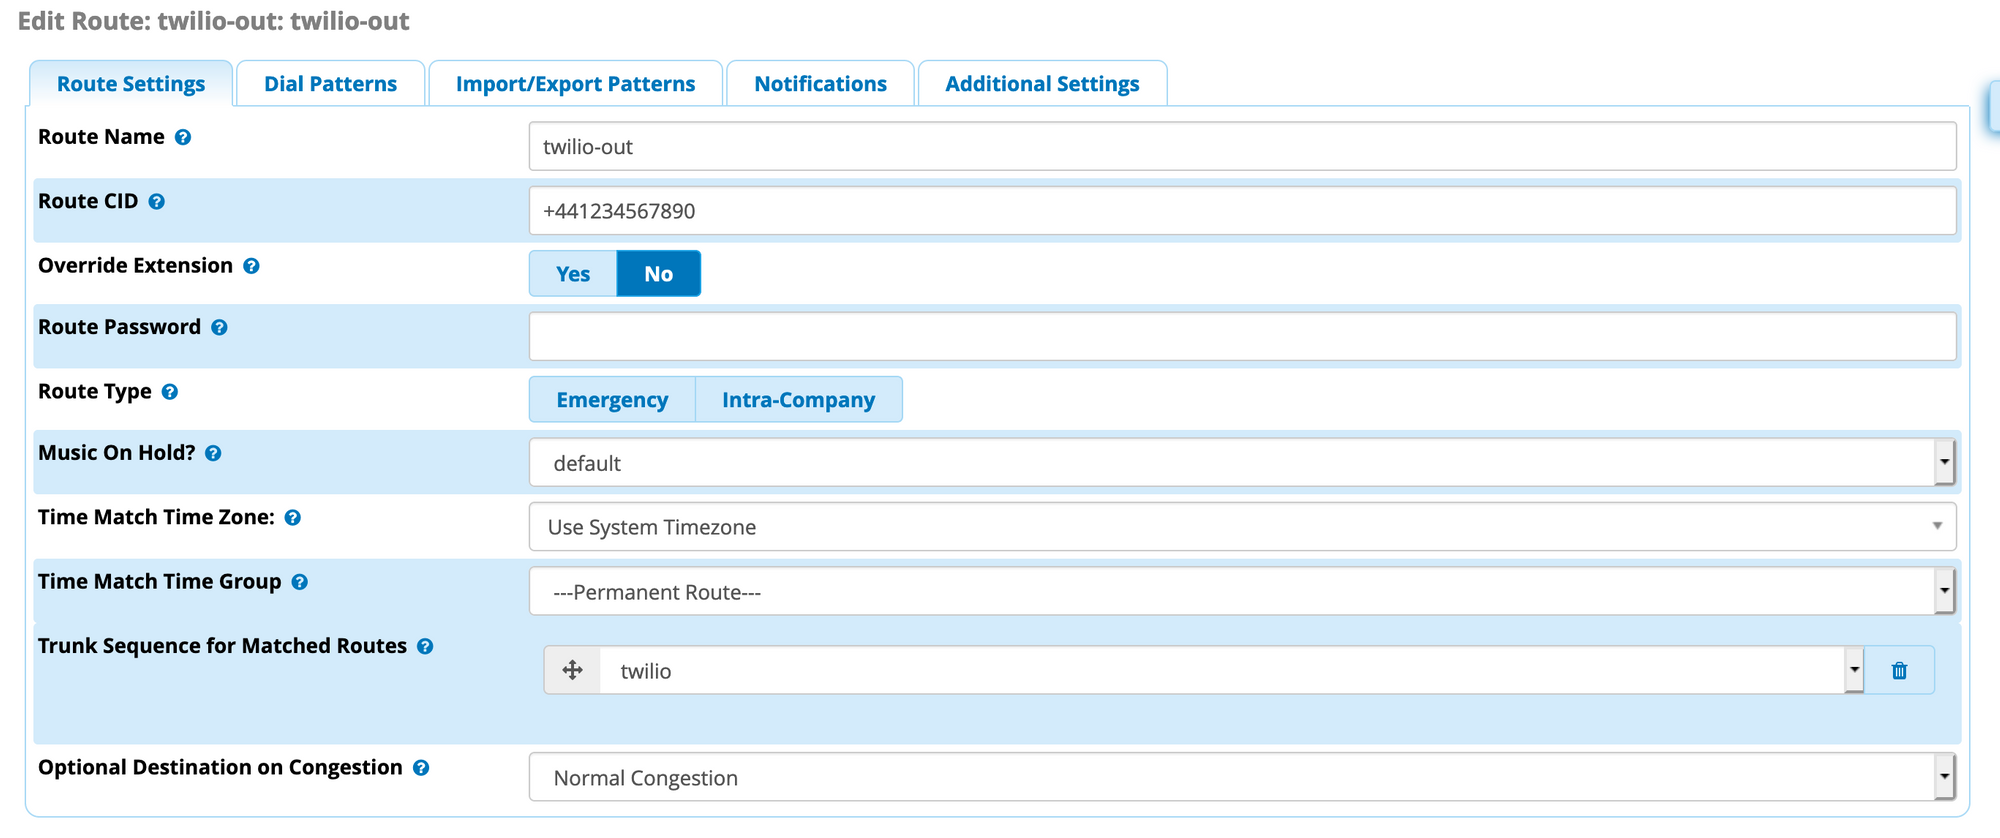
It is important to set the route caller ID (CID) as the number in the Twilio dashboard. It must contain the country code.
Set the trunk sequence for matched routes as 'twilio', or whatver you called your SIP Trunk in the step above.
We must also consider the dial patterns. In our example, we have created a pattern for 'dial 8 for an outside line' (as 9 is being used elsewhere!).
In this example, we check for the prefix '8' on the telephone, before also removing the leading '0'. This allows us to manipulate the number by adding the country code.
So how does this work? If we call '80830123456', which would be an Irish mobile number, it removes '80' (prefix) and adds +353 (prepend), so the final result is +353830123456, which Twilio accepts as a valid number.

Creating an inbound route
Before adding an inbound route, some router configuration is required.
In order to allow the 'signal' from Twilio to your PBX that an inbound call is coming, you will need to add a port forwarding rule for port 5060, but only for some chosen Twilio IP addresses for the region that you choose (probably the one region to you). You can find the IP addresses to whitelist here. My router accepts CIDR notation, so I can allow it from the four consecutive IPs by using /30 on the IP.
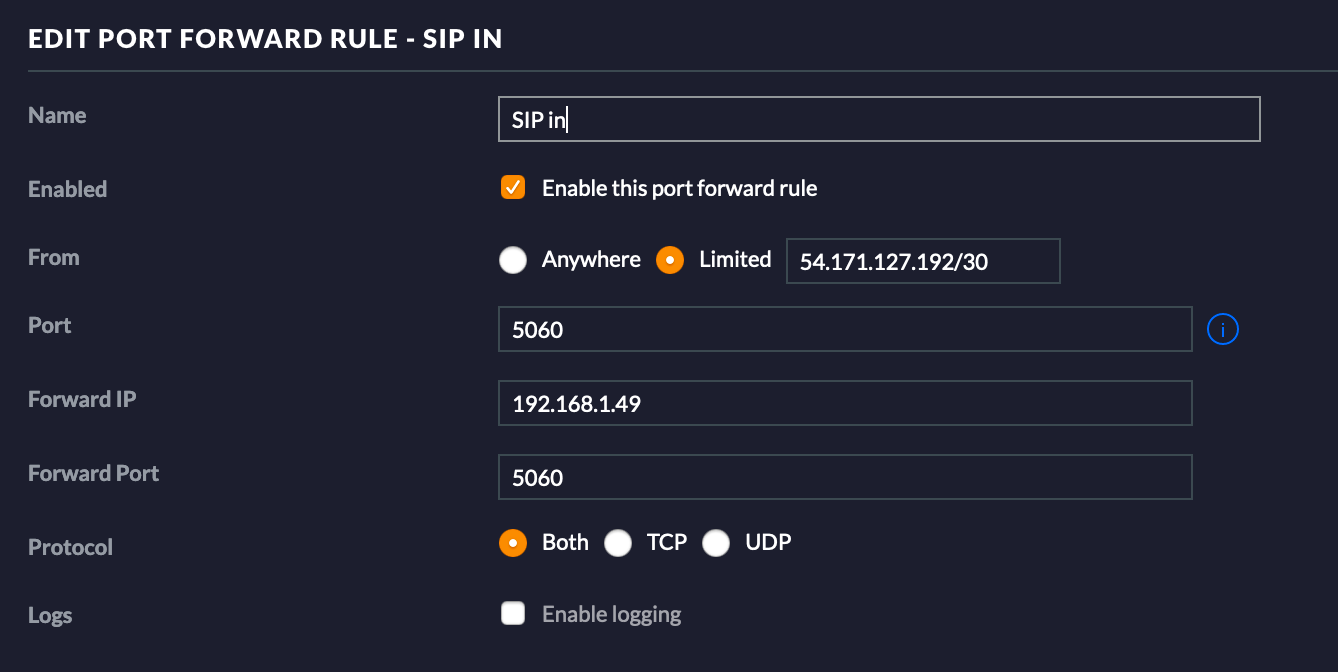
Remember I said don't expose your system to the web? Well this is an exception, and we are whitelisting chosen sources that are allowed through the firewall.
Next up, you can follow the YouTube videos shown above to set up inbound routing. When setting up the 'Origination URI', you can use a dynamic DNS address, and you should append 'region' to it, like this;
sip:myPBX.no-ip.tld;region=ie1Appending the region to the URI means Twilio will send the 'signal' of inbound call from the specified region - which should be the IP addresses you whitelisted for your firewall earlier. The region tags can be located here.
When completing up your Inbound Route, remember to set the Destination to your new Extension: 320 - Donald Trump. This will route your calls from Twilio > SIP Trunk > PBX > Extension.
Testing
In the third guide I will discuss setting up Polycom VVX phones - if you don't want to wait until then to test it out or if you don't want to set up a physical phone, you can download Bria to test your PBX.
A free account can be set up for Bria, which resets after the trial to Bria Solo Free (previously X-Lite).
To get Bria set up, log into their online portal, and add a 'voice server using your own PBX'.
- Add a label like 'My PBX'
- Domain is the IP or Hostname of your server
- SIP Username is the extension number: 320
- SIP Password is the extension secret from earlier
- Under service settings, set Sip Proxy to the same IP or Hostname used on the first tab as 'Domain'
- Save the configuration. Download Bria, log in, and give it a try! Don't forget to call out using '8' for an outside line, and remember that you need to have verified the number for Twilio to allow it to connect.
- If you are having trouble, you can find details for test calls on Twilio under SIP > Termination and SIP > Origination.
FreePBX hints
- A number of guides will tell you to use port 5060 for 'chan_sip'; this was old behaviour and has changed for the latest version of FreePBX/Asterisk. Now, port 5060 is for 'chan_pjsip' and port 5160 for 'chan_sip'.
- On your FreePBX installation, a number of modules will appear 'paywalled', i.e. you can't use them without a licence. If you wish to disable these modules, you can do so in 'Module Admin' under the 'Admin' tab.
To disable a module, expand the module info, click 'Action: Disable' then scroll to the top or bottom of the page and click 'Process'. You can enable and disable modules as much as you like. - A helpful module on FreePBX is System Admin. You receive access to the 'free' version of System Admin on the base install. From this module, you can update the licences on the system, reboot the server, etc. You can also access the 'Fail2Ban' admin, which will list any blocked IP addresses. This can be helpful if you are having issues with device connections to make sure that bad authentiation hasn't led to the device being blacklisted.
Check back soon for Part 2 of the FreePBX series, which will explain how to get a normal telephone line connected to your PBX!